|
Do you want to learn how to upgrade your kitchen faucet yourself? Plumbing repairs in any form can be a scary idea. But upgrading your kitchen faucet is not as difficult as it might seem. 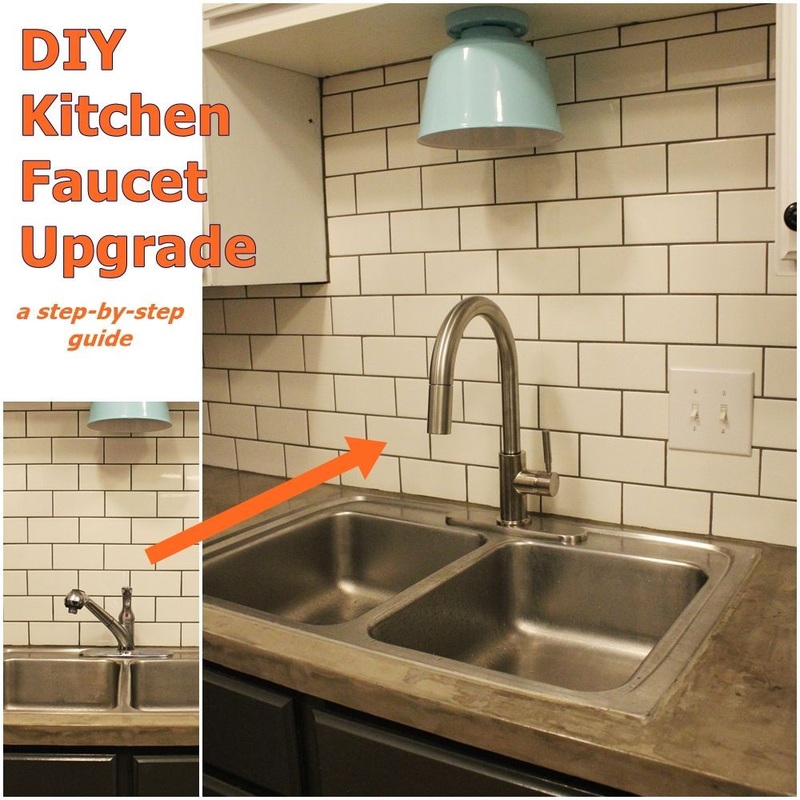 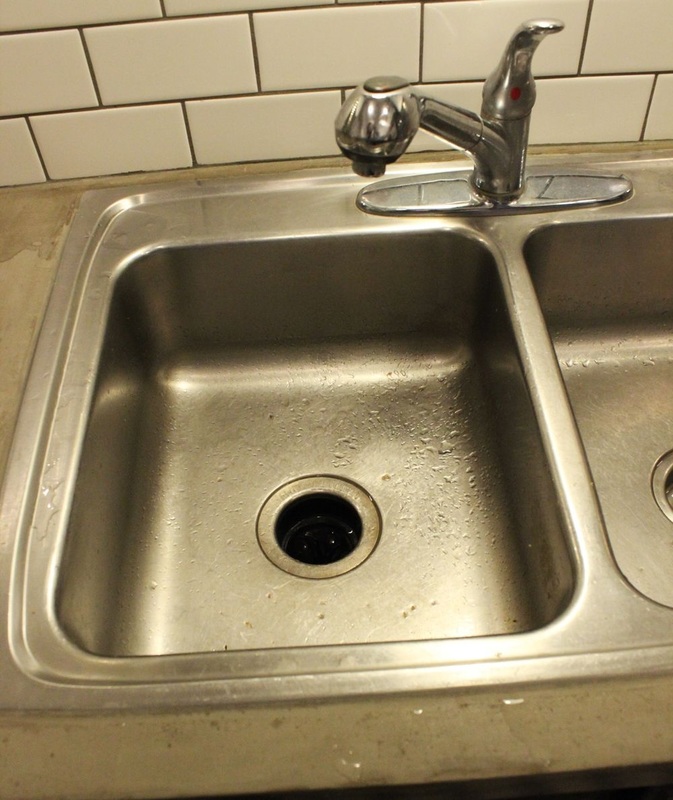 Especially when you come out to your kitchen sink in the morning and find that your kitchen faucet has been dripping all night… 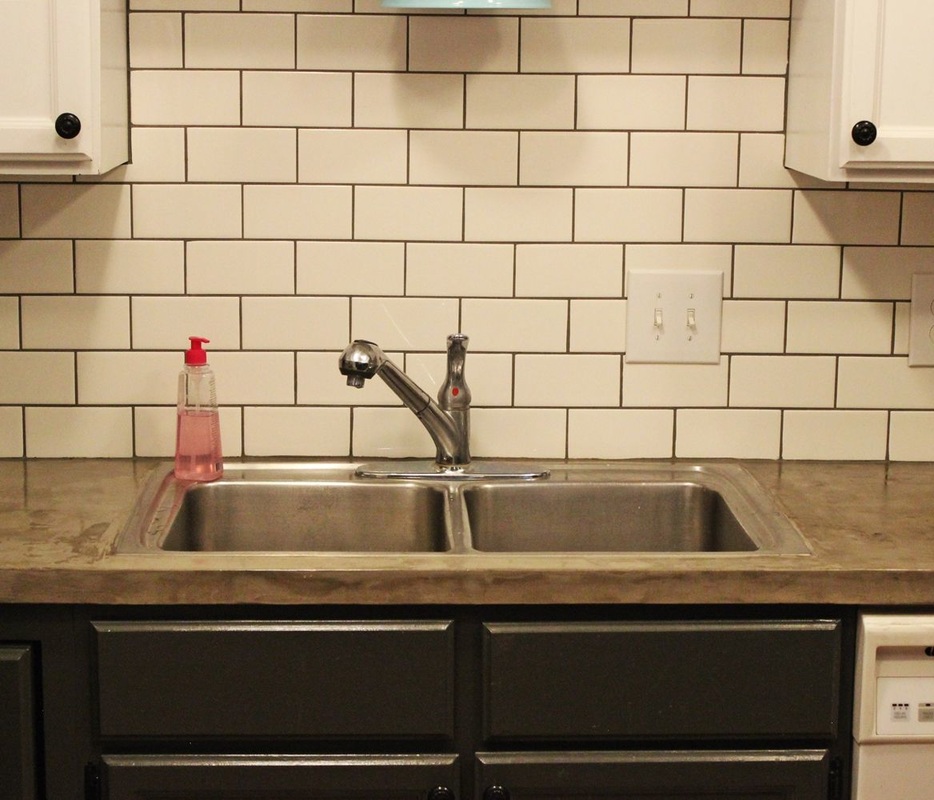 …or you find yourself consistently underwhelmed by your faucet’s lack of personality or style, it might be time to consider a kitchen faucet upgrade. If you think it’s time to make a statement in your kitchen, this article is for you. Let a new kitchen faucet showcase your style better; and let the installer of that faucet be YOU! This step-by-step tutorial provides plenty of photographic guidance to help you make the change. Let’s begin. 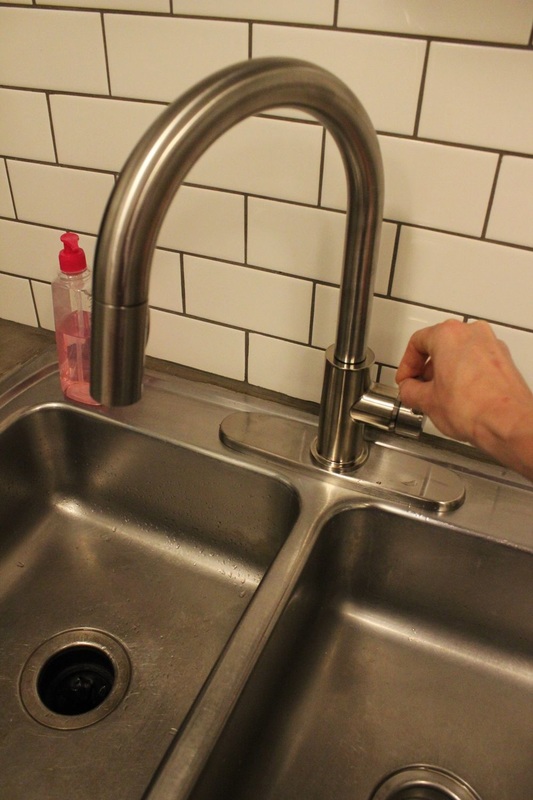 DIY Level: Intermediate Materials Needed:
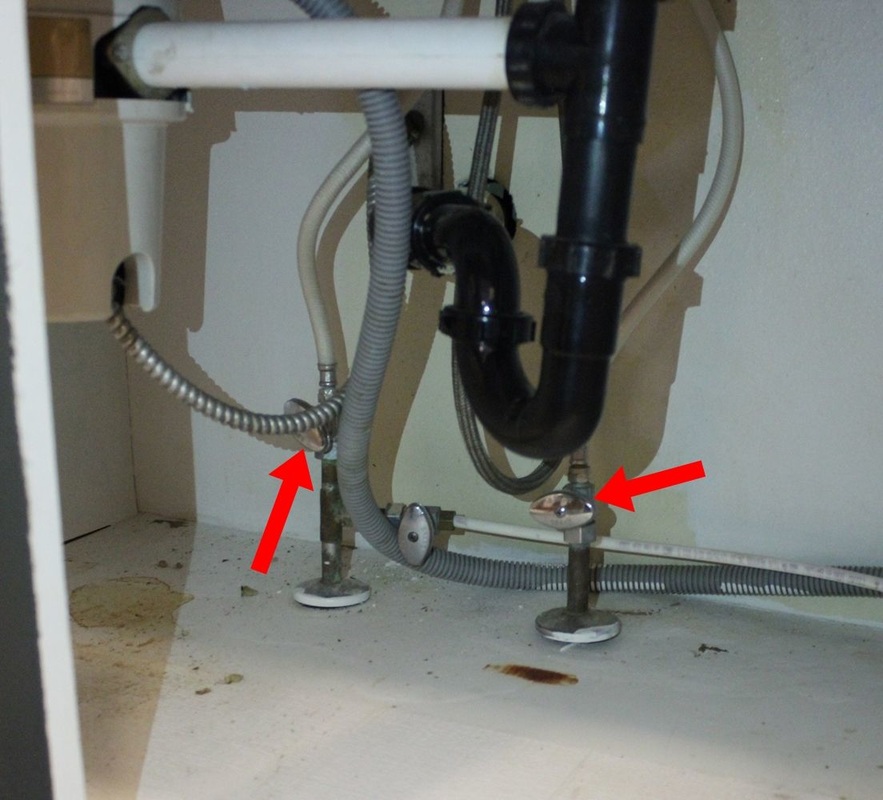 To begin, after you’ve cleaned out under your kitchen sink, you’ll need to turn off the water to your faucet. Turn off the Hot and Cold water sources. (Tip: These will have visible hoses running directly up to the faucet’s base.)  After you’ve turned off both water sources, turn the faucet on. A little residual water may run out, but then it should be dry. 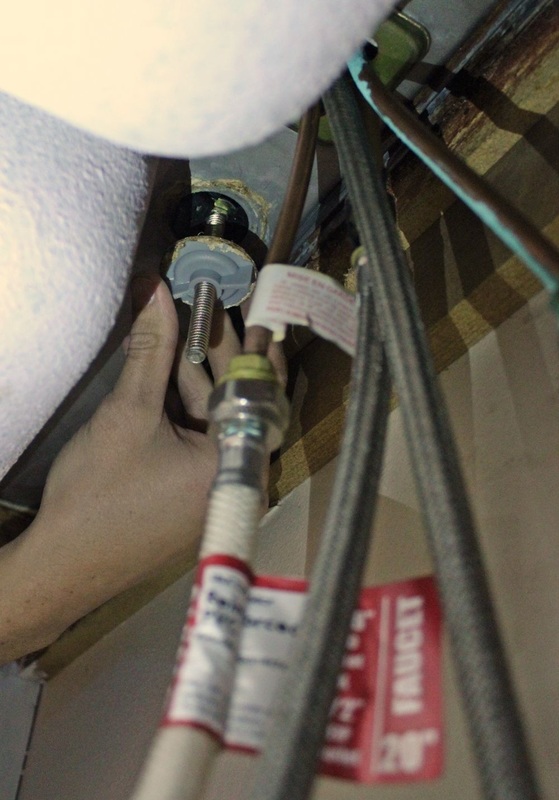 If your faucet has an escutcheon (the “optional” 10” mounting plate that rests under the base of the faucet shank), you’ll need to loosen this. Reach up under the faucet and unscrew and remove the two mounting nuts from the two mounting bolts/shanks.  Since your water is now turned off, you have no need for the hoses up to your faucet. Disconnect these (red arrows in the photo). Also disconnect the faucet outlet hose from the faucet-mounting bolt (blue arrow in the photo). 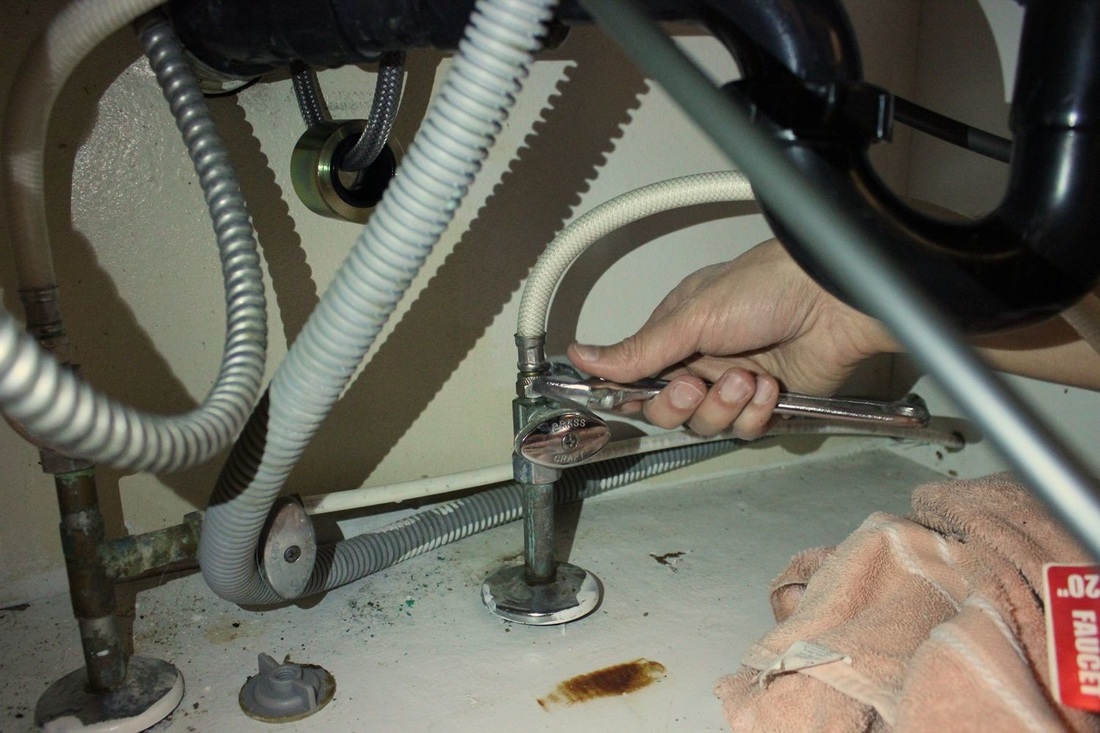 (Tip: Some faucets may have additional-length hoses that connect the faucet to the water source; some faucets may have hoses that are long enough to connect themselves. Either way, disconnect them all.) 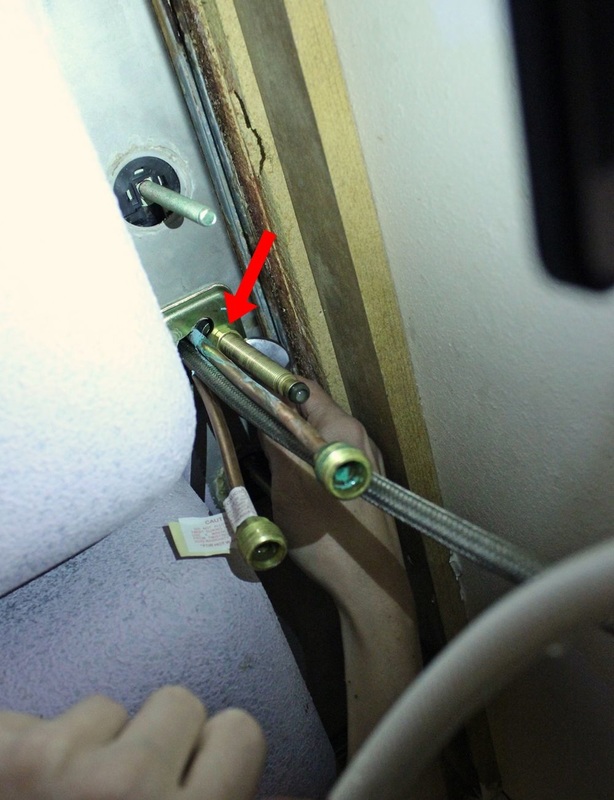 Use a crescent wrench to unscrew the nut from the faucet-mounting bolt. 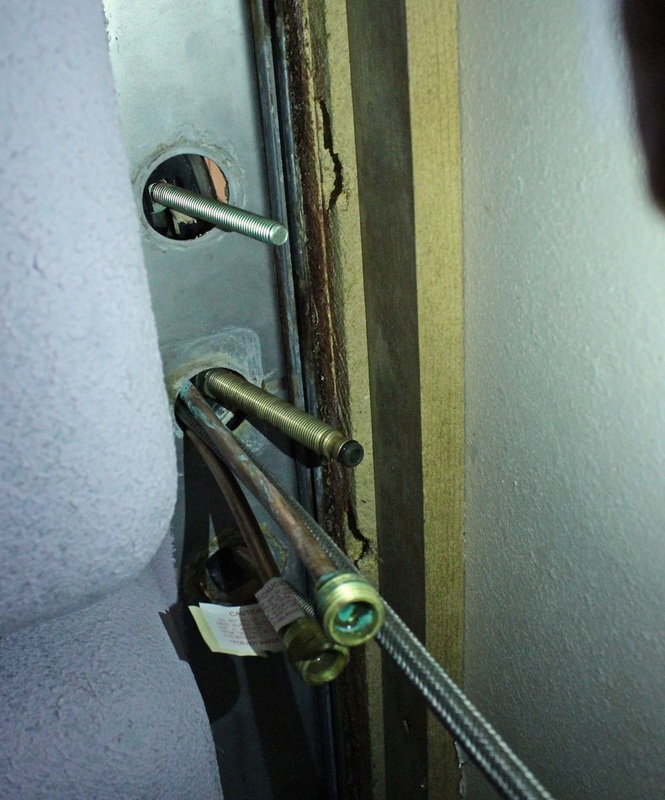 Everything is disconnected at this point – the two escutcheon mounting bolts, the water hoses, and the faucet mount. 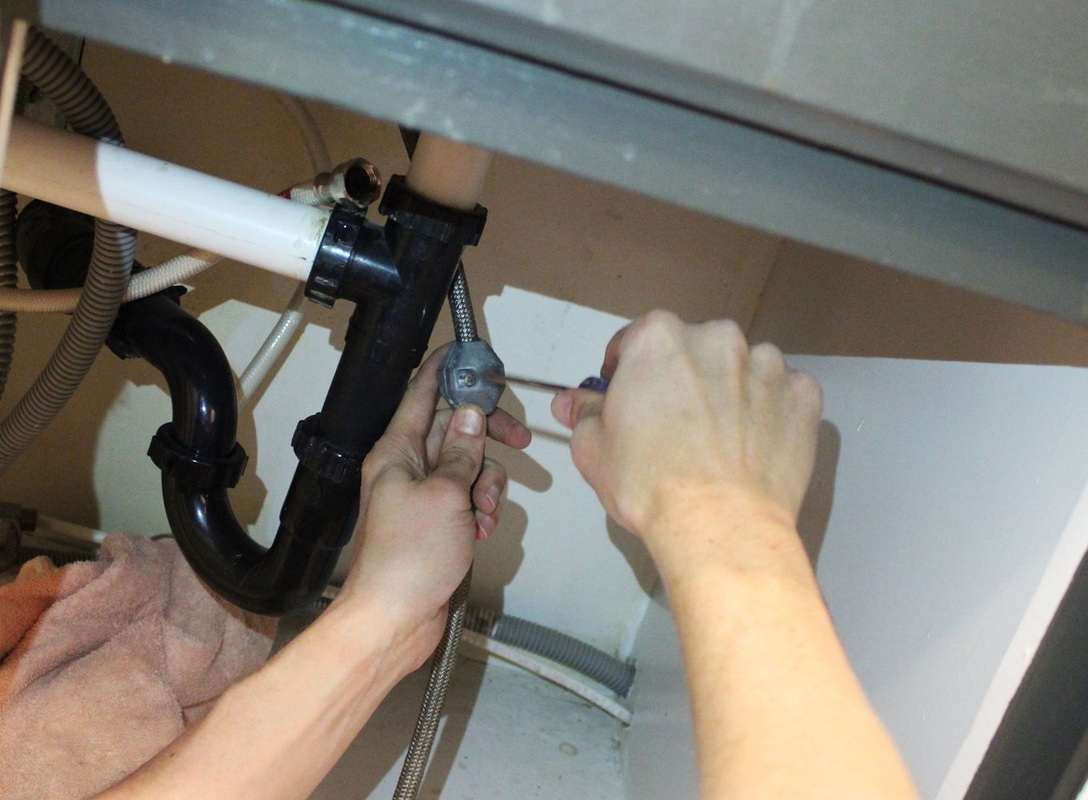 Use a screwdriver to loosen the weight from the faucet hose. 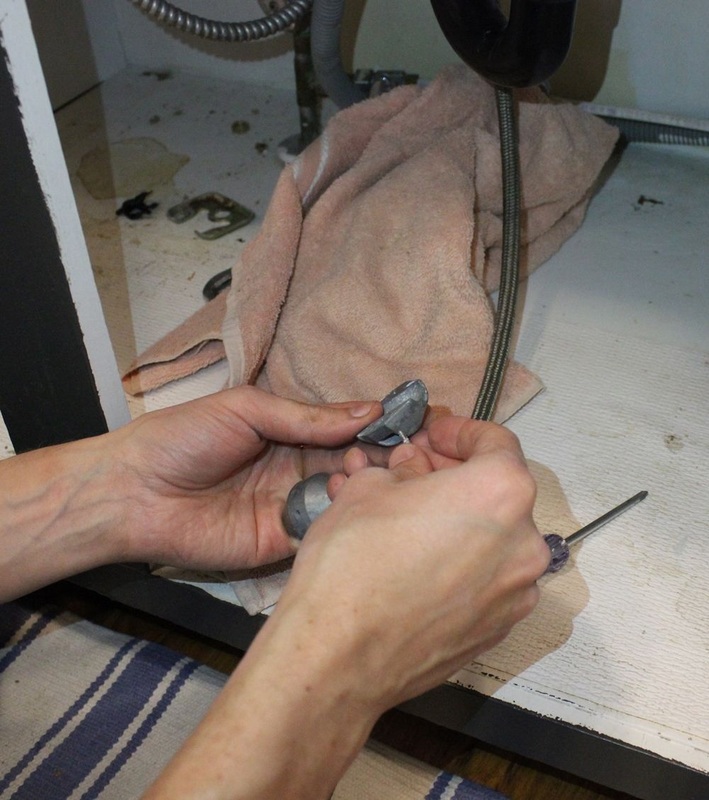 Remove the weight from the hose. 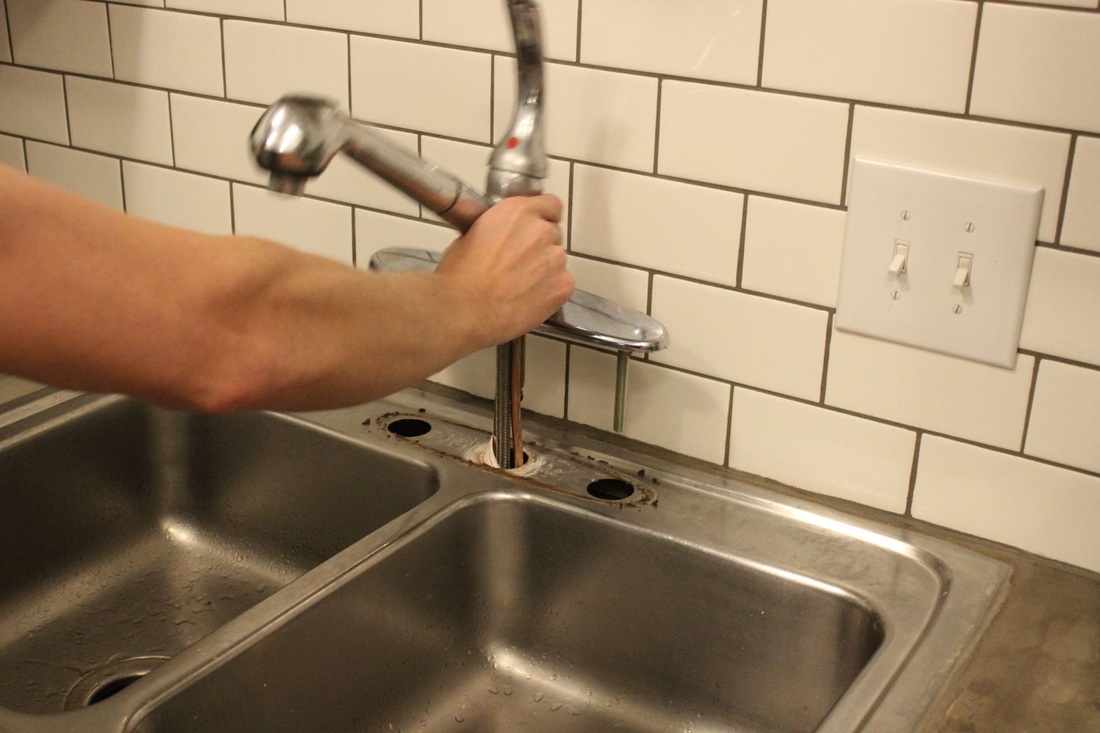 With everything disconnected, it’s time to remove your old faucet. 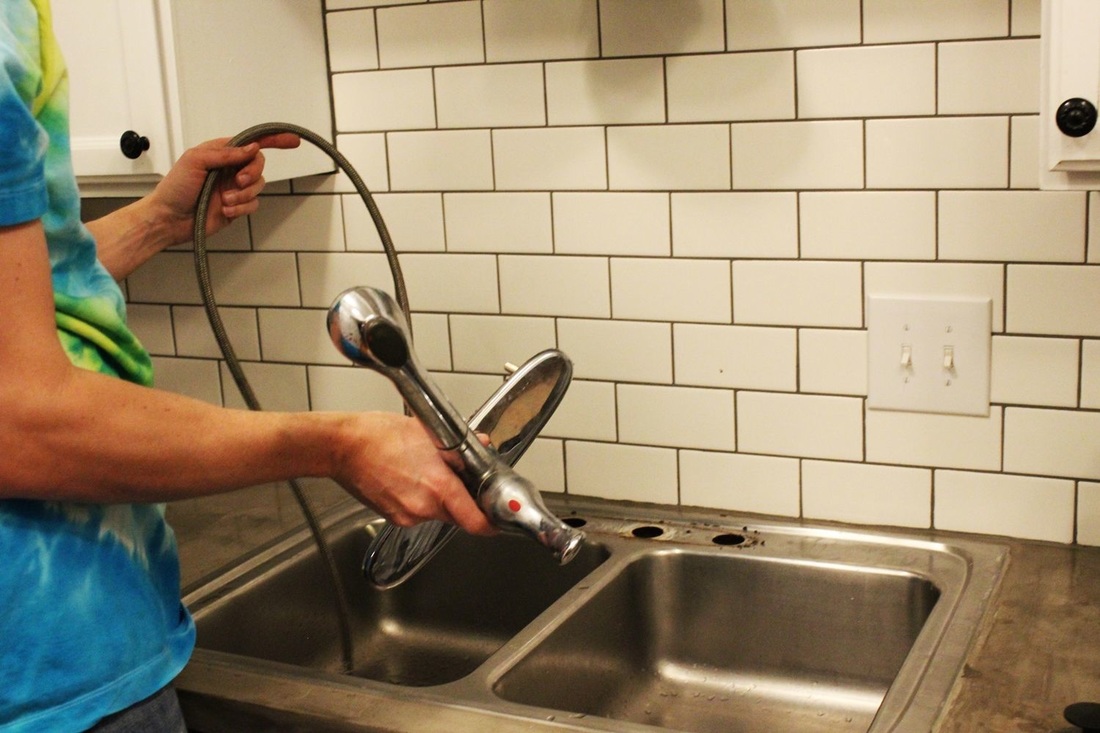 Pull the kitchen faucet and all of its connected pipes, tubes, hoses, whatever, up and out of the sink holes. 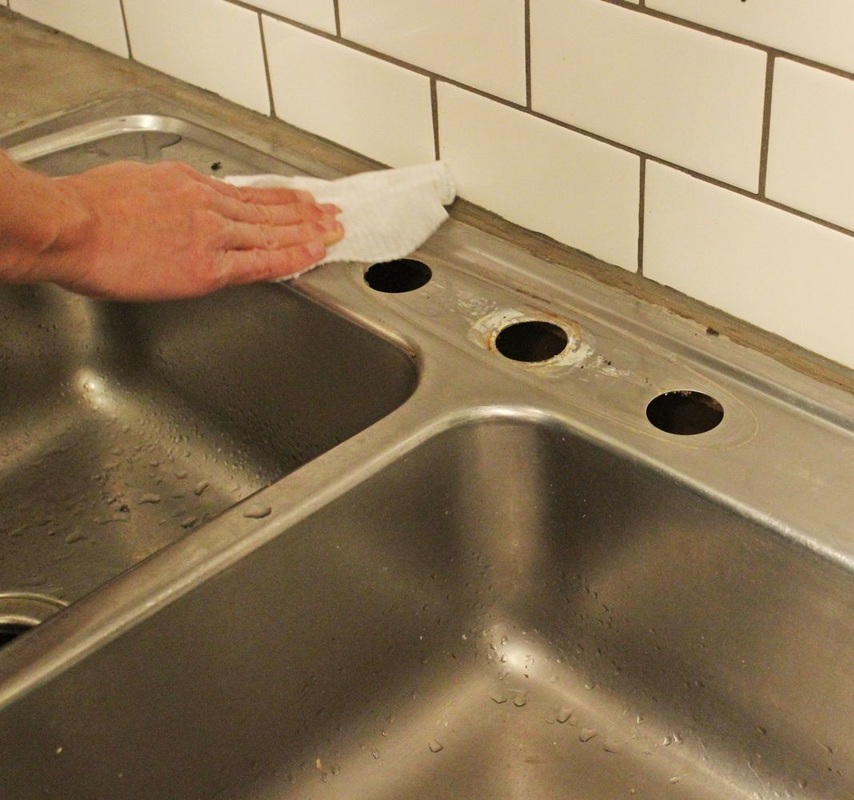 Clean the sink-top around the faucet holes and edge of old escutcheon plate. 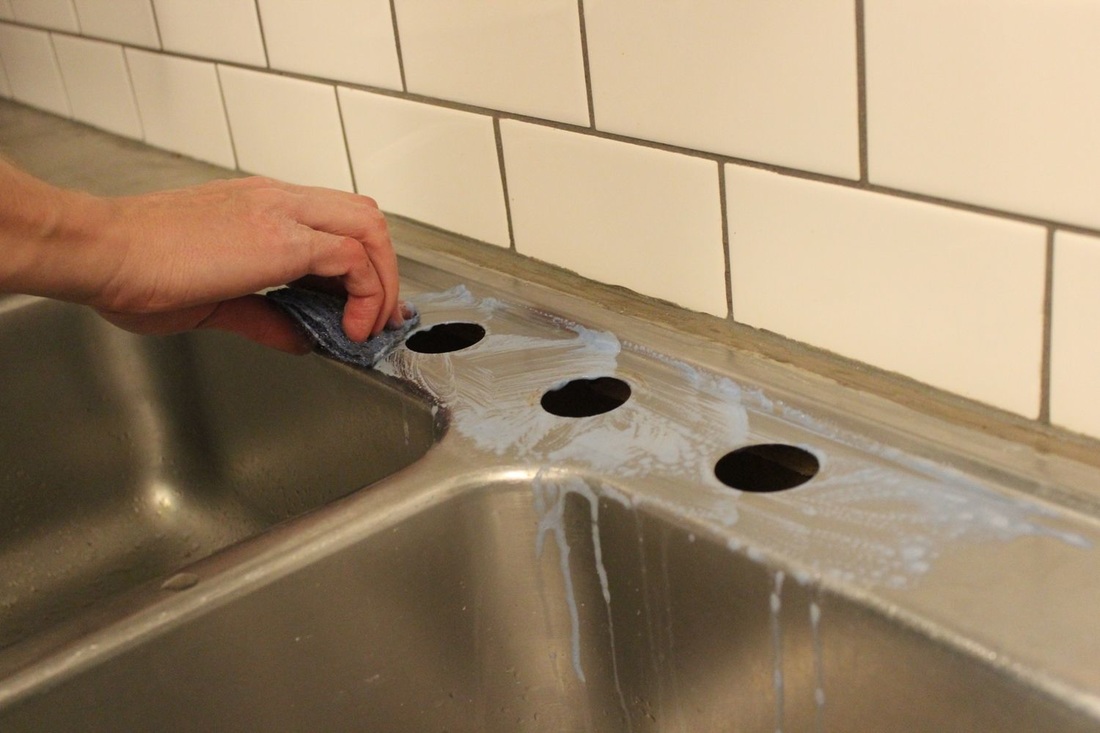 (Tip: If you choose to use an S.O.S. scouring pad, be careful not to scrape your sink’s surface too much.) 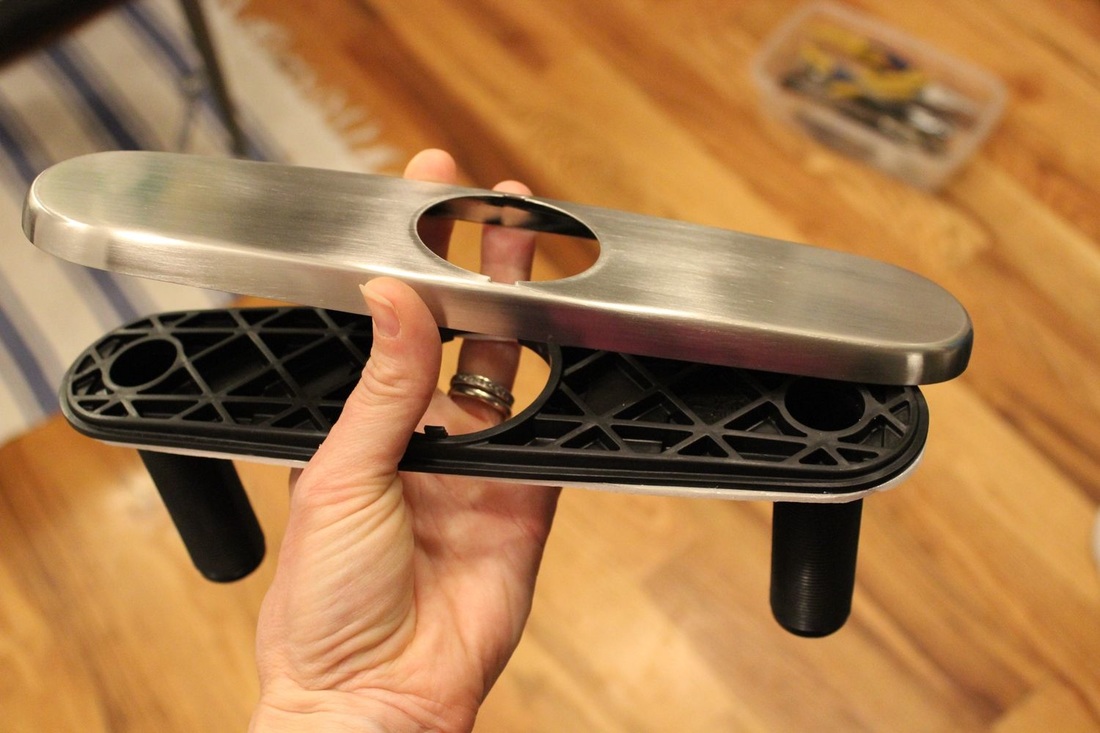 Grab the new escutcheon and under cover plate. 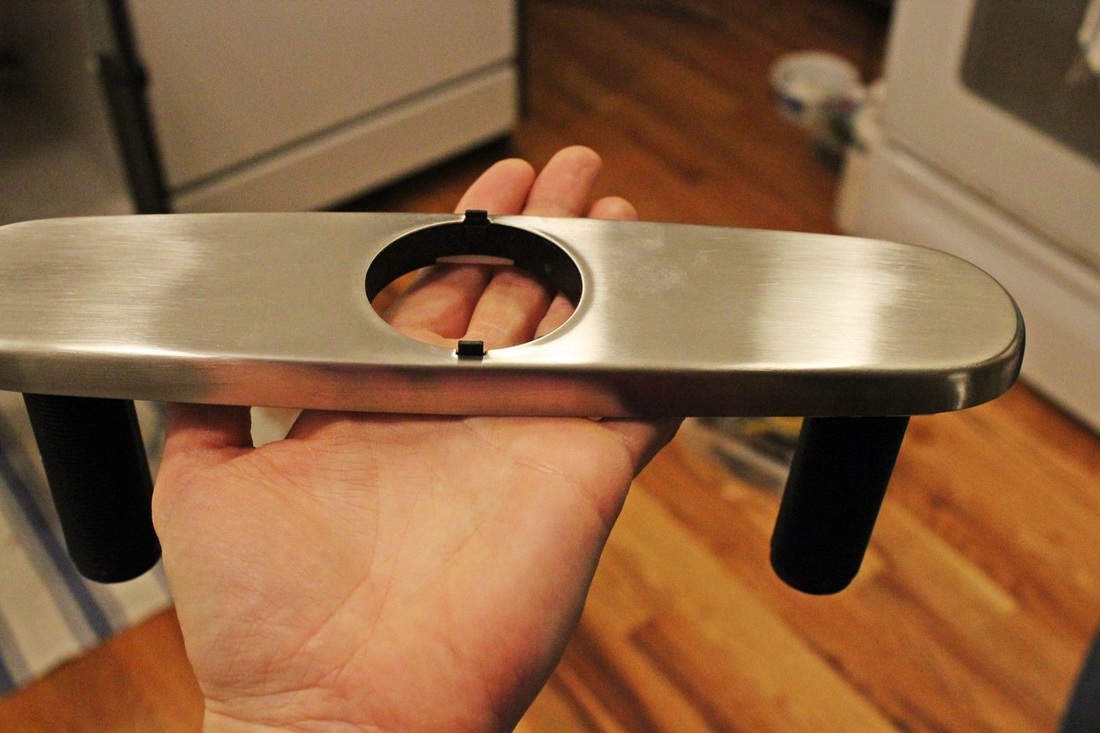 Attach them together. They won’t snap together, but they should fit snugly. 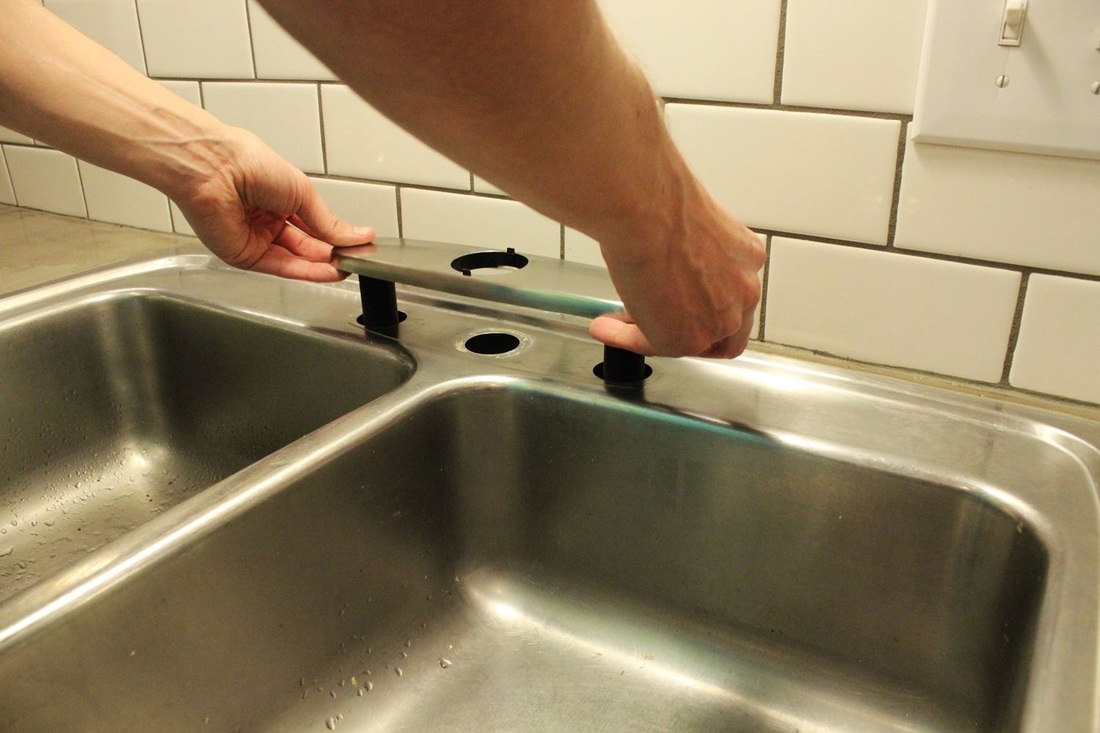 Place the escutcheon and under cover plate onto sink-top, with plate shanks going through the sink holes. 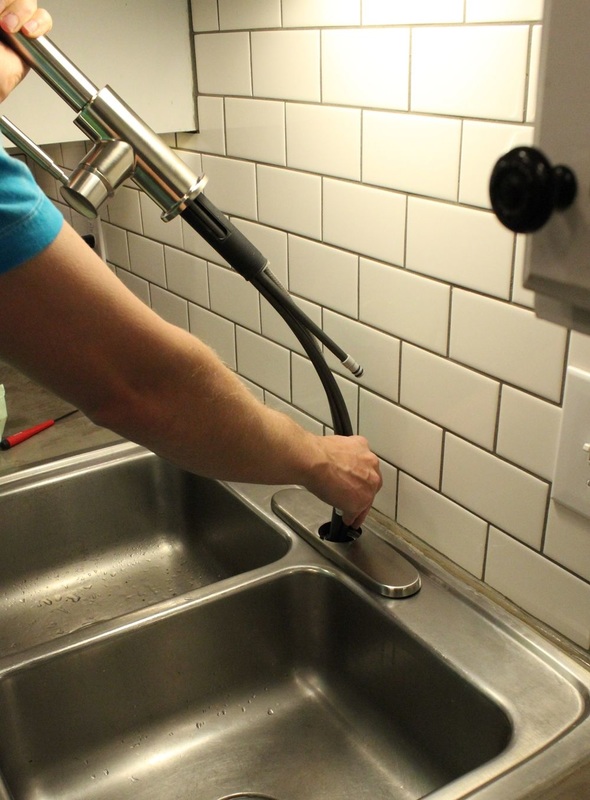 Grab the new faucet and carefully thread the hoses down through the escutcheon and center sink hole. 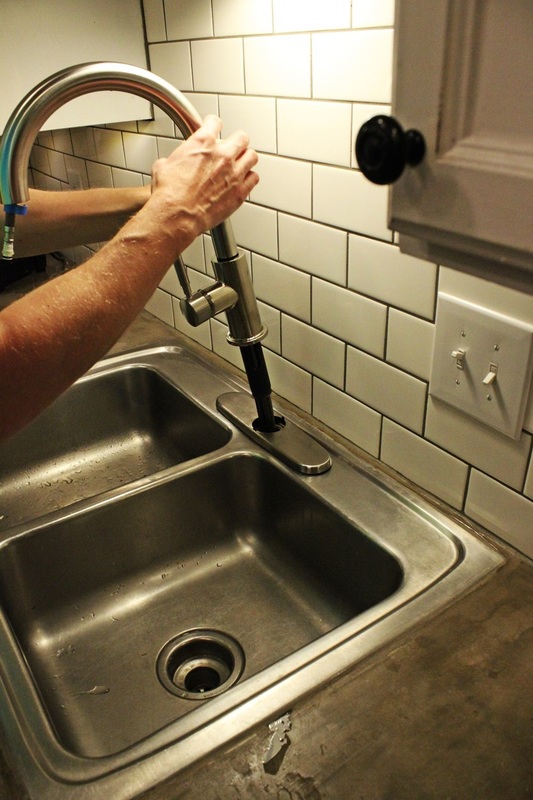 Push hoses all the way down.  Line up the hub of the faucet onto the escutcheon. (Tip: The tabs on the escutcheon should line up with slots on the bottom of the faucet hub.) Have someone hold the faucet in place up above… 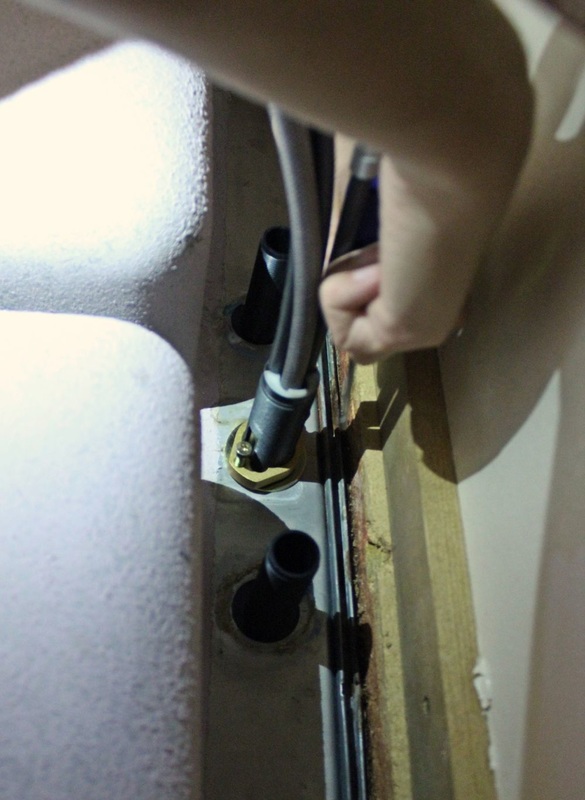 …while you head under the sink and place, then tighten by hand, the brass mounting nut and washer onto the new faucet shank. Use a screwdriver to lighten the locking screws. 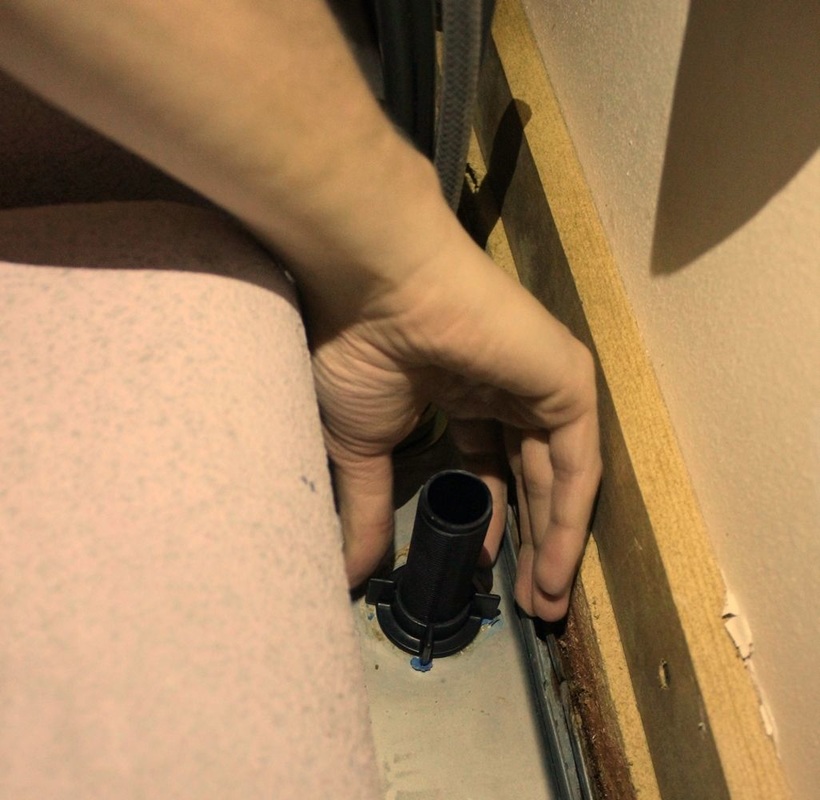 Place, then tighten with your hands, the two mounting nuts onto the under cover plate’s shanks to hold the escutcheon in place. 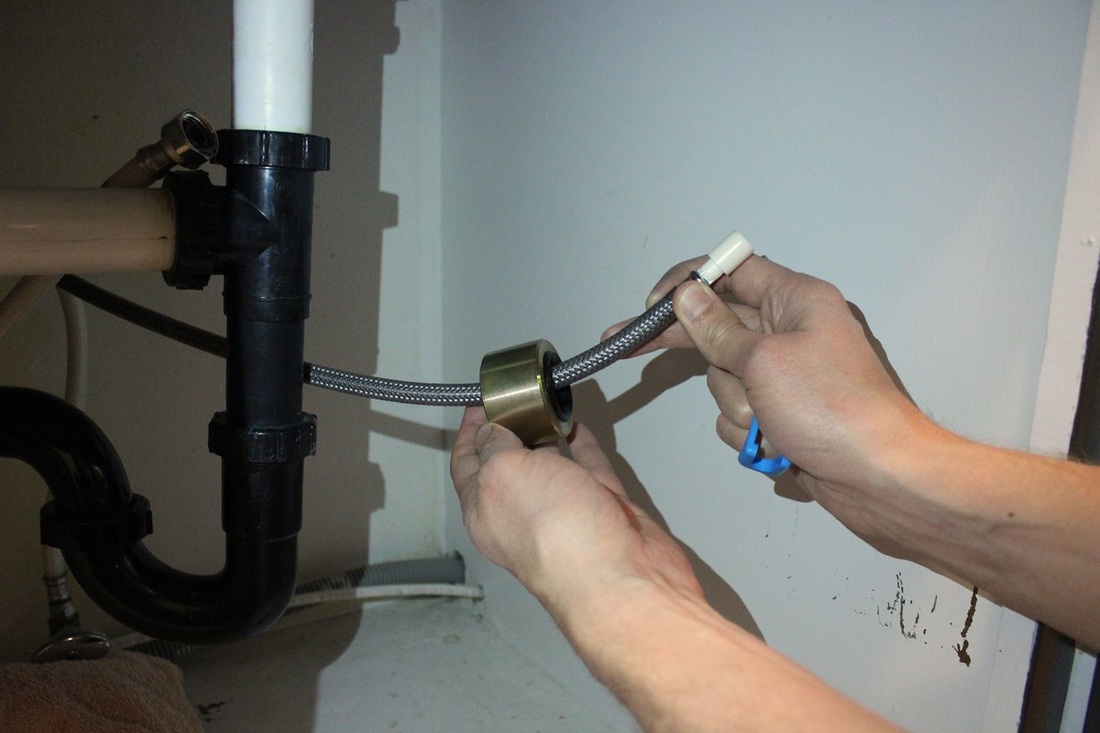 You’re almost done! It’s now time to install the hose weight. Make sure the faucet hose is still secured (generally with a plastic clip) up on the sink side so the hose doesn’t get pulled through the faucet during the next step. Under the sink, slide the weight onto the faucet hose. 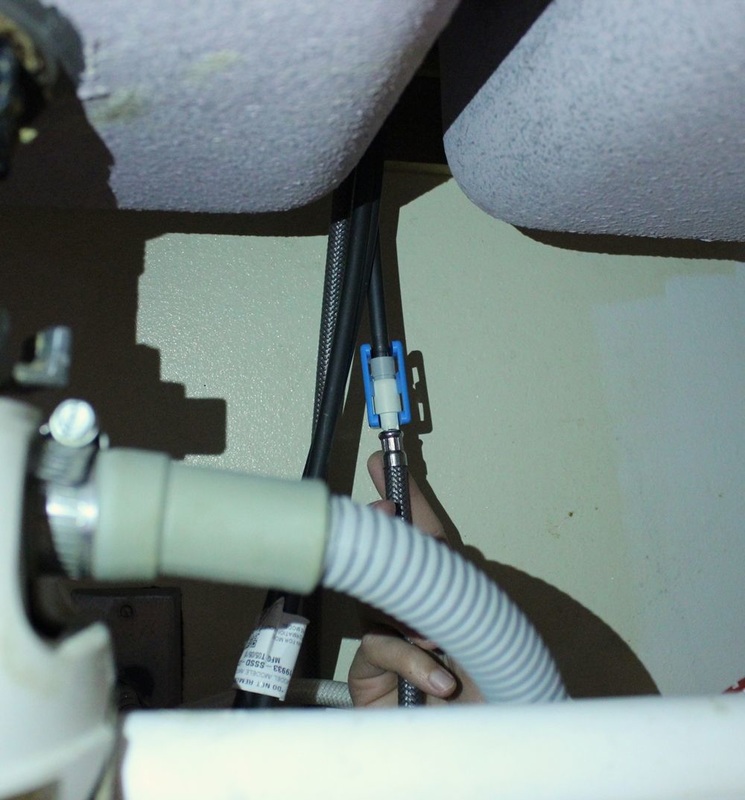 Attach the end of the faucet hose to the faucet outlet (right up under the faucet shank) with a clip or other attachment provided with the new faucet. Gently pull the faucet hose a bit to make sure it’s connected securely. 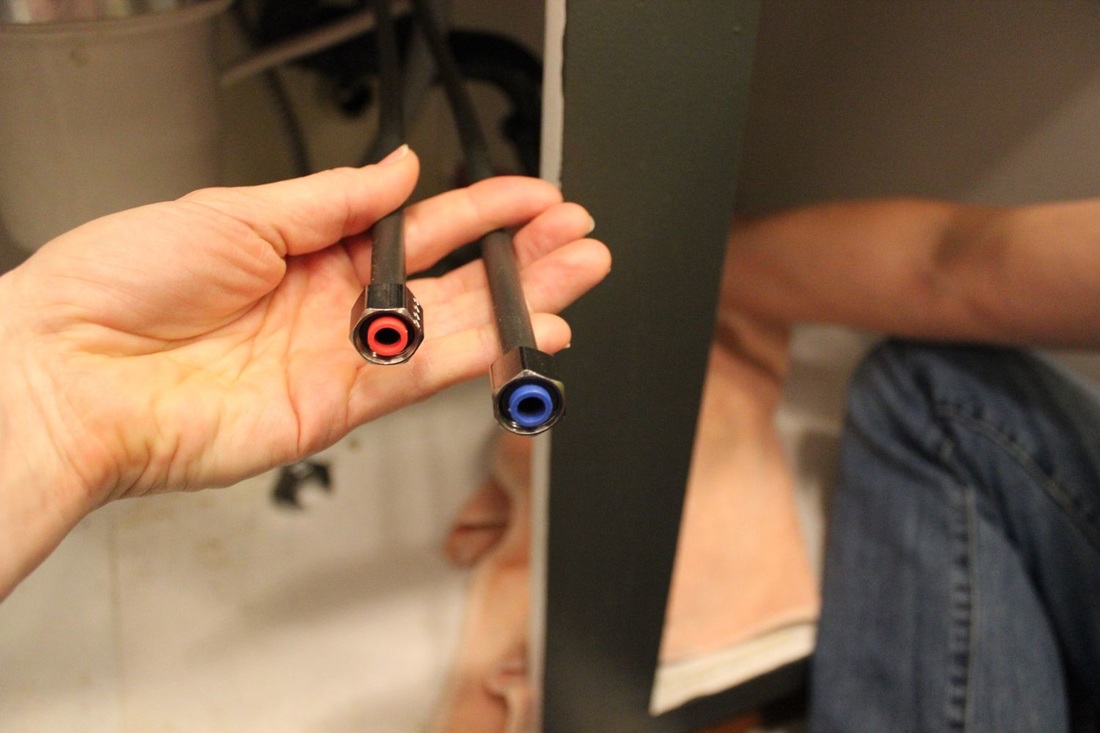 It’s time to re-hook up the water. You’ll notice Hot and Cold hoses coming out of your faucet. These need to be connected to the Hot and Cold water sources under your sink. 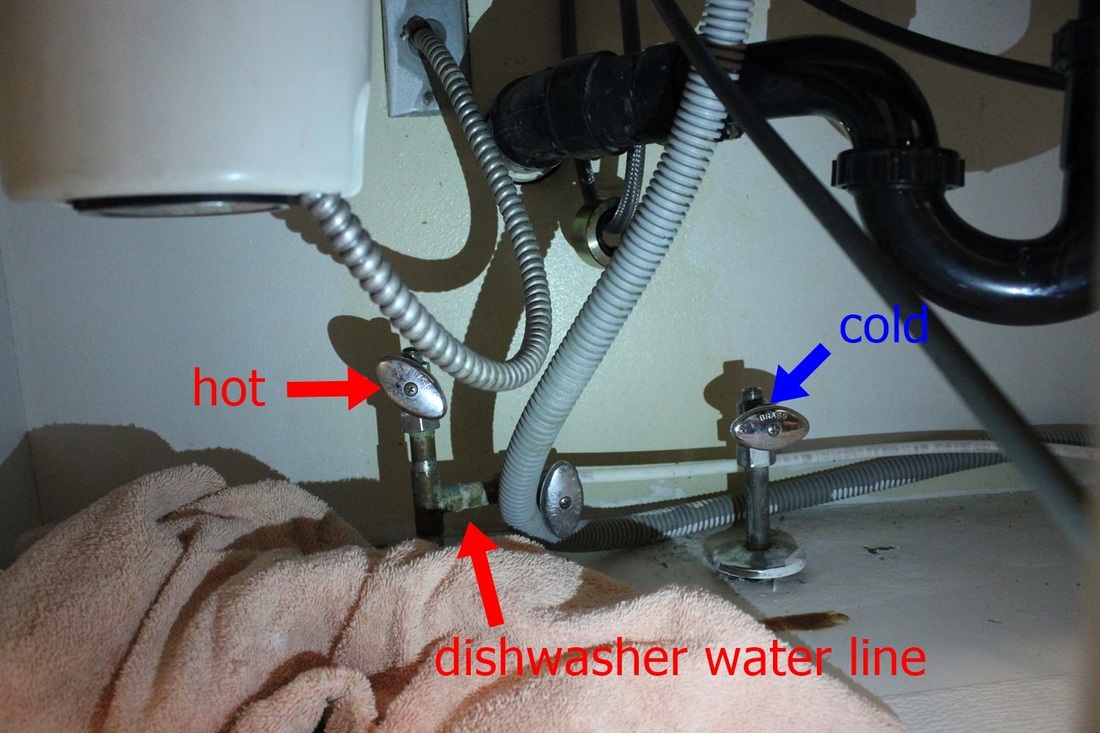 The water source that is connected to your dishwasher is the Hot line; the other is the Cold. 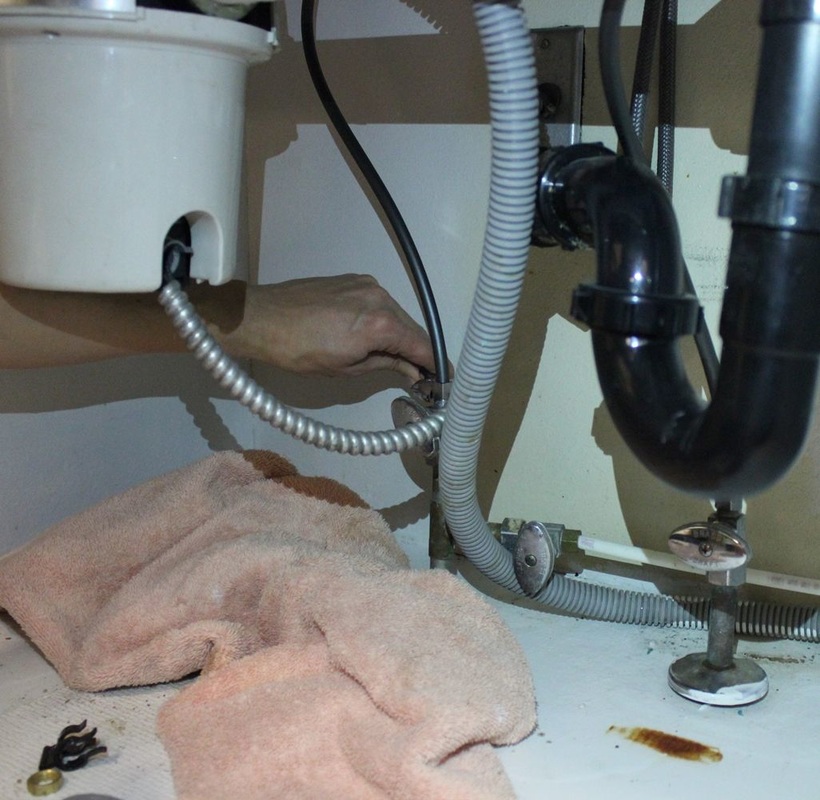 Attach the appropriate hoses to the water sources – hot to hot, cold to cold. 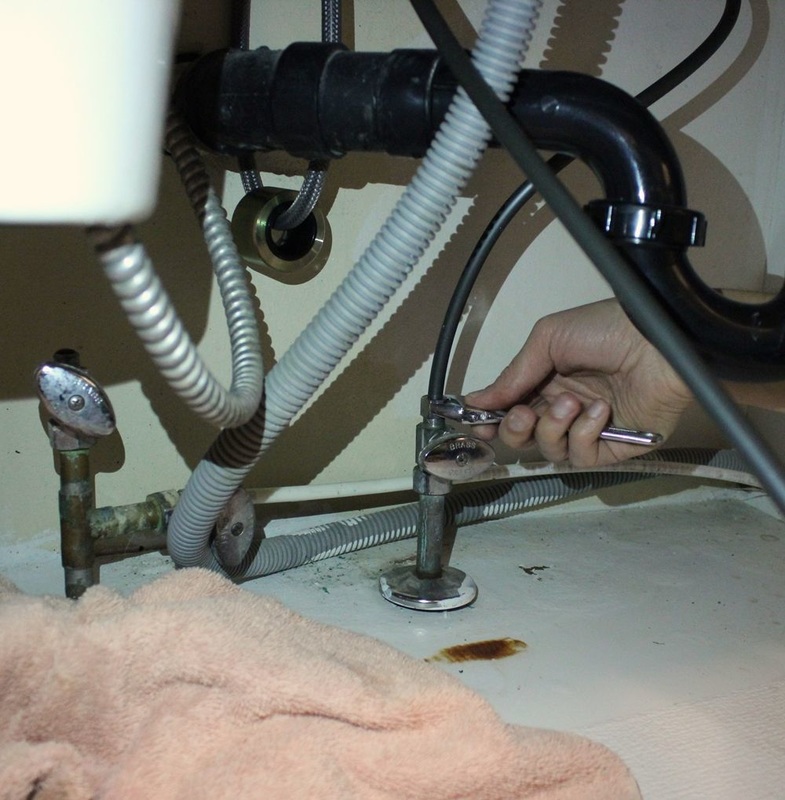 Use a crescent wrench to tighten connection, but don’t overtighten. 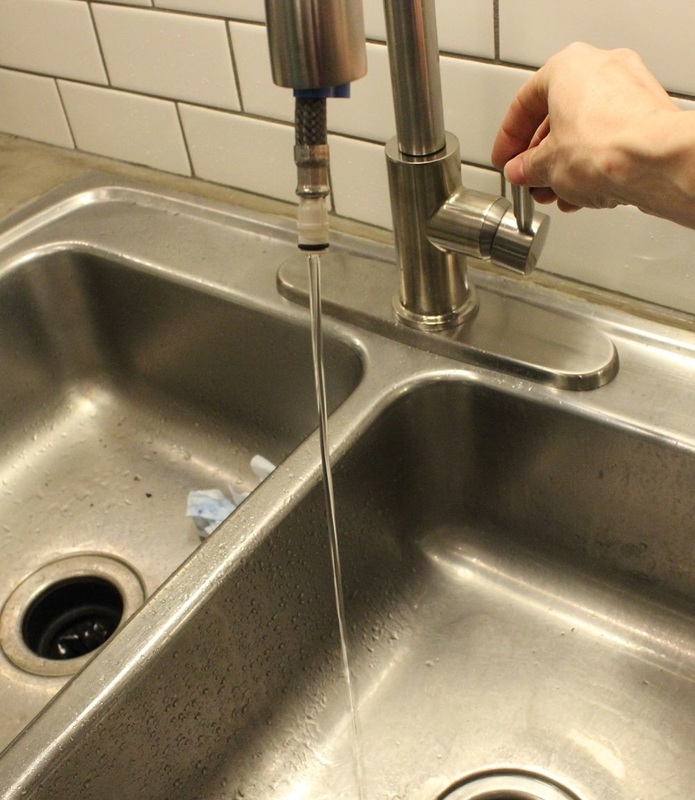 Turn on your faucet to make sure it works. Check under the sink for leaks. You good? Good! Run the faucet for a minute or two to flush out any debris. 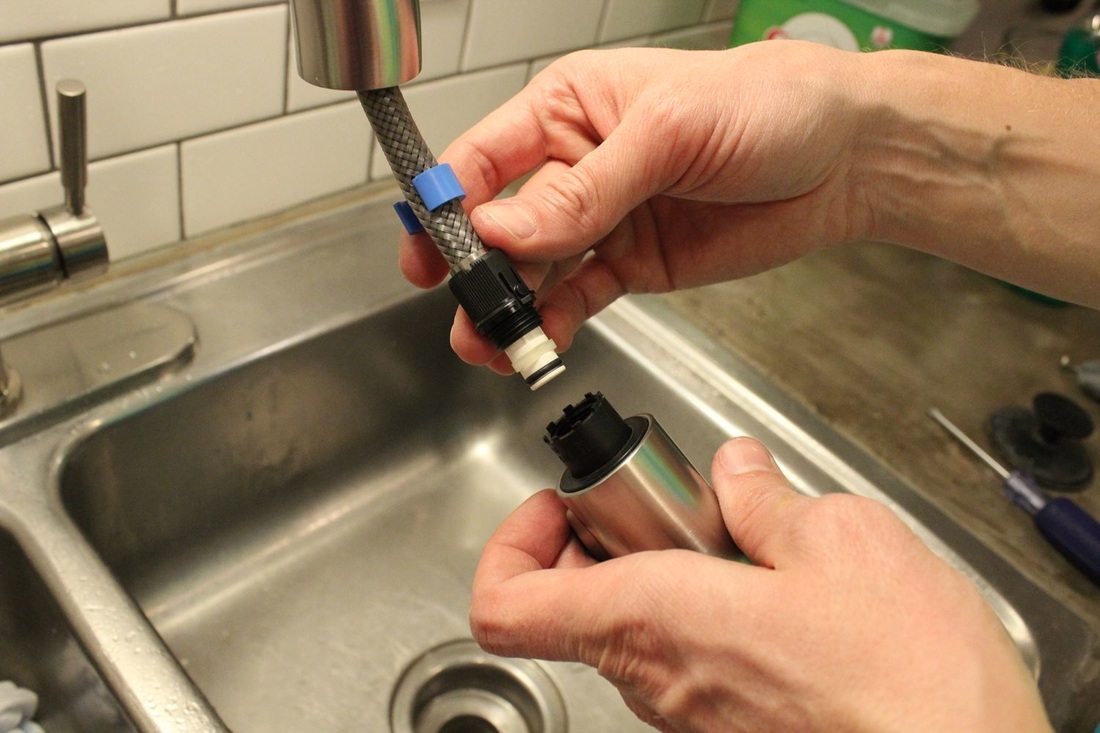 Last step is to attach the sprayer to the faucet hose.  Tighten the sprayer, then remove the clip from your faucet hose. 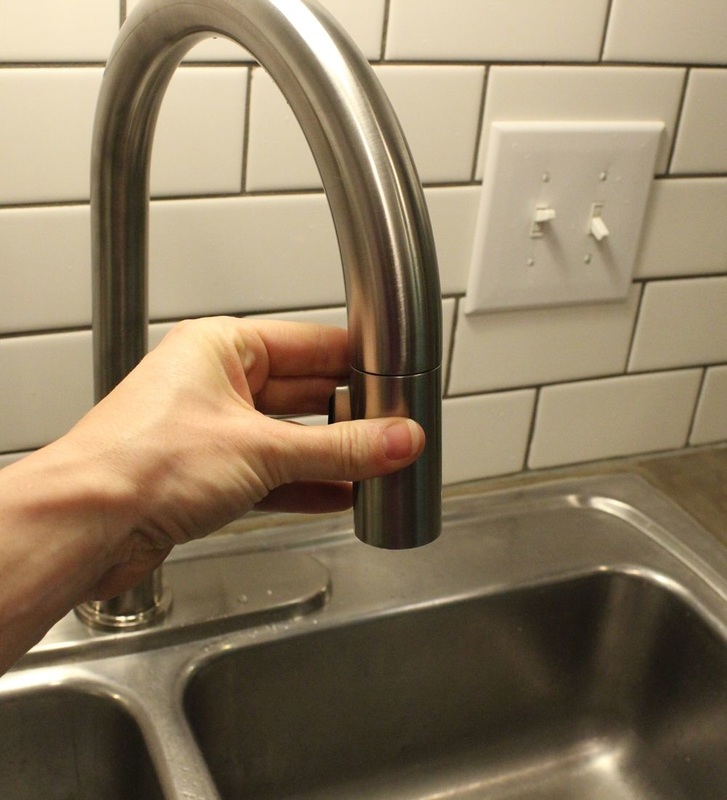 Place sprayer back up next to faucet spout. 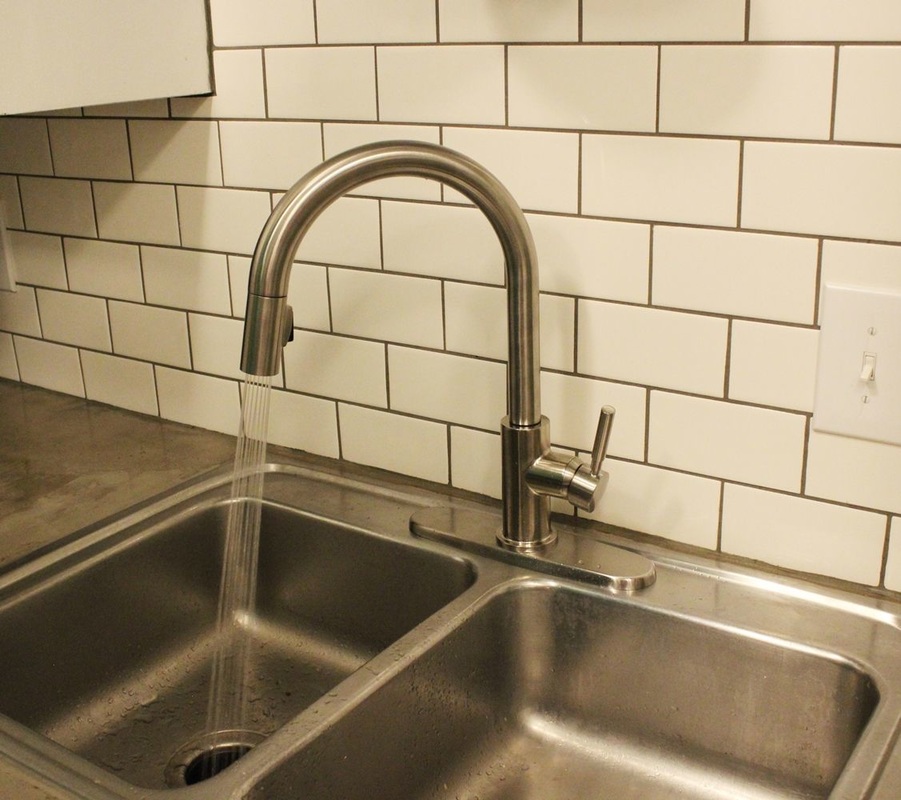 Try it out, just for fun. Double check under the sink to make sure all stays dry. 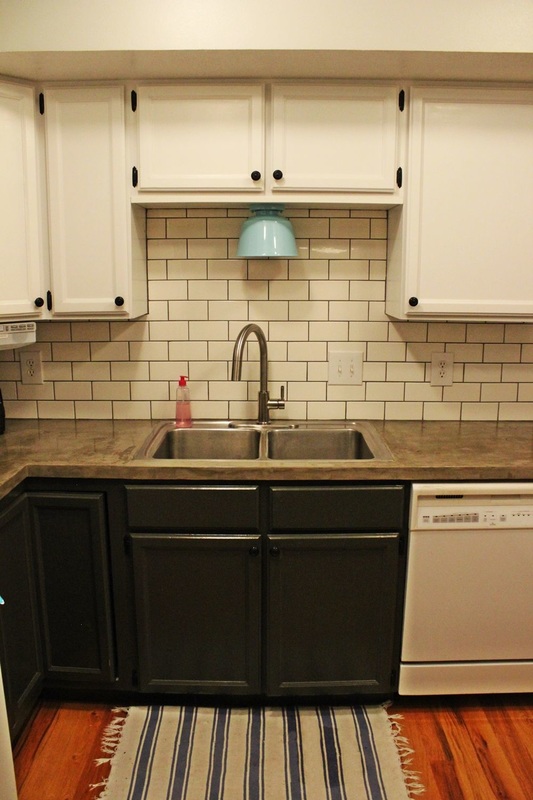 Congratulations! You’ve just installed an upgraded modern kitchen faucet! 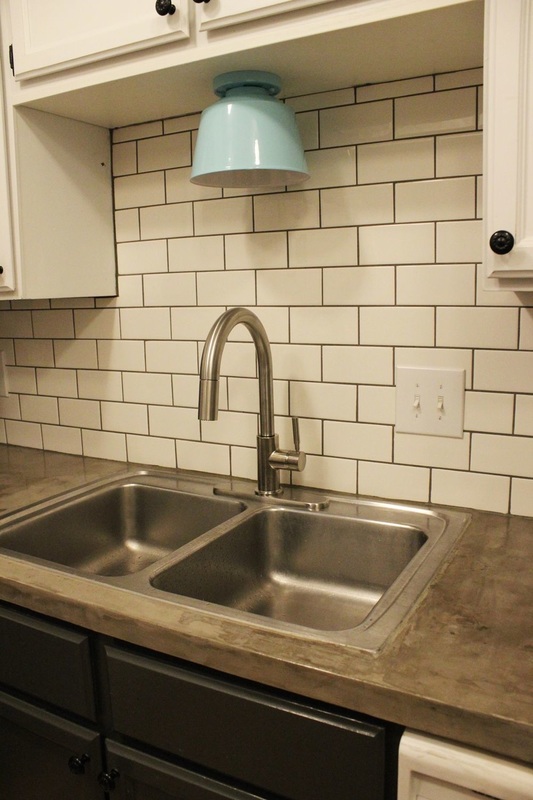 Not only does the new modern faucet NOT leak (function), but it upgrades the style of the entire kitchen (form). 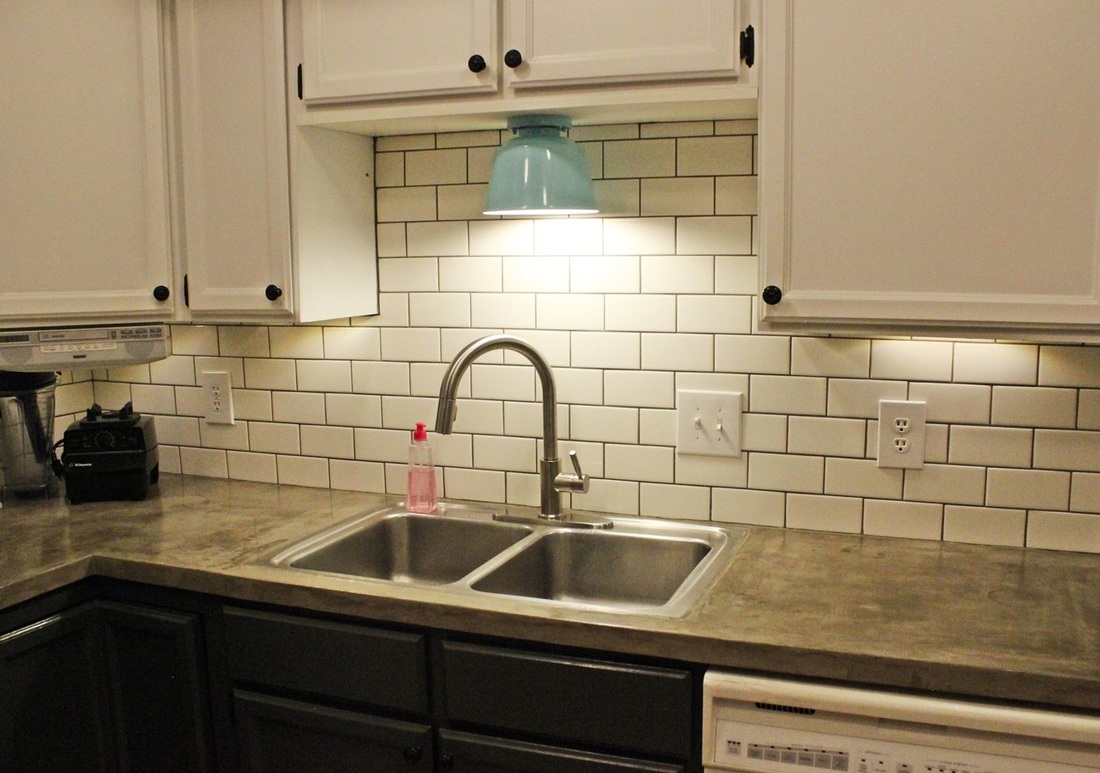 A new kitchen faucet can do wonders in making any kitchen feel updated. The scale of this particular faucet – its height in relation to the sink and in proximity to the over-sink light – lends a sense of presence. 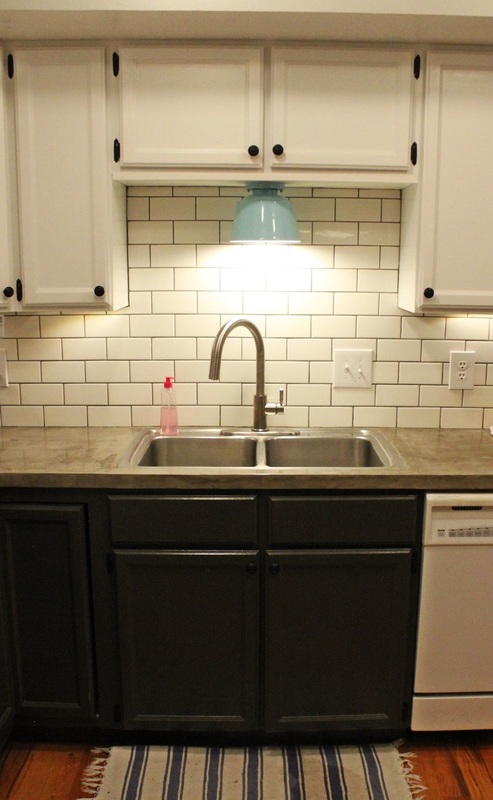 Are you surprised at how relatively easy this DIY upgrade turned out to be? I love it when that happens.  Enjoy your new kitchen faucet and the upgraded style of your “new” kitchen!  
0 Comments
The first step in the process of replacing a faucet is choosing a new one. Check your sink first, to see how many holes it has in it. Ours had four, so we chose a faucet style with a built-in soap dispenser and a sprayer.
After you decide what you want, shop around at Amazon, Overstock, and your local home improvement store to find a style you like with functionality that you need. You can find great deals on Overstock especially; there are many styles there that we liked. OK, so faucet is in hand! Here are the basic steps of replacing a kitchen faucet.
Steps: 1. Turn off water and remove the garbage disposer, if necessary.
2. Cut old copper water supply lines using a close-quarter hacksaw; catch any water dripping out in a bucket. 3. Use a basin wrench to loosen the nuts holding the old faucet in place; remove old faucet. 4. Apply a bead of plumber's putty under the mounting flange of the new faucet. 5. Set faucet's mounting flange on the sink deck, then tighten the two nuts from below with a basin wrench or wrench that comes with the faucet. 6. Use a propane torch to unsolder the old shut-off valves from the hot- and cold-water copper pipes (risers). 7. Buff clean the ends of the risers with emery cloth to remove old solder and grime. 8. Install the new shut-off valves onto the ends of the risers; tighten the compression fittings with two open-end wrenches. 9. Place the faucet on the mounting flange, then from below install the mounting plate and tighten the brass nut with the special wrench provided. 10. Connect the spray hose to the underside of the faucet by snapping on the spring clip. 11. Use a screwdriver to tighten the weight onto the spray hose. 12. Using a bending spring, bend the rigid lav supply line to reach from the valve to the underside of the faucet. 13. Use two open-end wrenches to tighten the nuts that connect each supply line to the shut-off valves and faucet. 14. Turn water back on, test for leaks. Replacing a kitchen faucet is a simple DIY job you can do within a few hours. Installing a kitchen faucet will require simple plumbing tools and you don’t have to be an expert to do the job right. Whether you need to replace your existing kitchen faucet because it is outdated, corroded and leaking, or maybe the one you want to install has a newer power spray head. Whatever the reason for replacement is, we will show you the easiest procedure to remove and replace a kitchen faucet all by yourself. 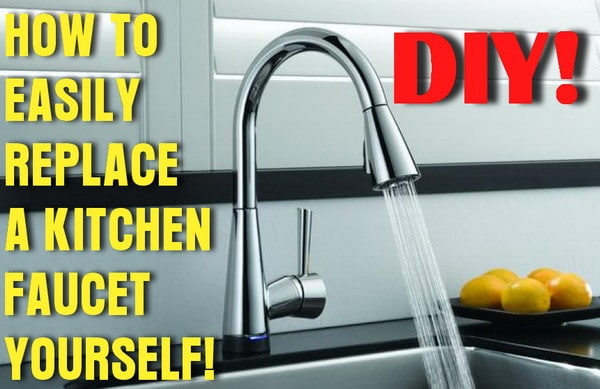 Tools needed to remove and replace a kitchen faucet:Screwdriver(s) Basin Wrench (optional) Adjustable Wrench (Adjustable Spanner “Crescent Wrench”) Adjustable Pliers Plumbers Putty Plumbers Tape (Thread Seal Tape)  The most difficult part of replacing a kitchen faucet is removing the old one previously installed. Use good lighting (a light that attaches on top of your head is best) and clear goggles to protect your eyes. If you are going to be replacing the kitchen sink also, then the absolute easiest way is to attach the new kitchen faucet to the sink before you install the sink! This makes things much easier! Also to explain what a couple things that are used for plumbing is as follows… The most difficult part of replacing a kitchen faucet is removing the old one previously installed. Use good lighting (a light that attaches on top of your head is best) and clear goggles to protect your eyes. If you are going to be replacing the kitchen sink also, then the absolute easiest way is to attach the new kitchen faucet to the sink before you install the sink! This makes things much easier! Also to explain what a couple things that are used for plumbing is as follows…  Basin Wrench is also called a sink wrench and is used to get at the hard to reach nuts that hold your faucet to the sink. 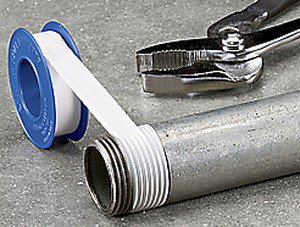 Plumbers tape goes on the threads of ALL areas where water goes through the lines. Plumbers tape is a Teflon tape that adds an extra “no leak” protection to the threads so the water will not leak out.  Plumbers putty is just a simple putty that is like clay. It goes on certain areas to create a water barrier. It is used under the deck plate of a 1 hole kitchen faucet so water does not leak down into the cabinet area. So after you have decided you need to replace your kitchen faucet for whatever reason, you will need to purchase a kitchen faucet, possibly some basic tools, safety and lighting equipment etc. Your kitchen sink will usually be a 3 hole sink. Some are 4 hole which means you have an extra hole in the sink for a separate water sprayer or a soap dispenser. If you have a 3 hole sink then just about any kitchen faucet will work as a replacement as it will come with a hole cover plate (deck plate) to cover the 2 holes next to your 1 hole faucet. If you have a 4 hole sink, then you can purchase a 1 or 3 piece kitchen faucet WITH a separate water sprayer OR soap dispenser to fill in the 4th hole. If you do not need these then a sink hole cover (blank plug) can be installed. Once you have everything you need to remove and replace your kitchen faucet including the tools, safety goggles, materials, and faucet, see our step by step below…  Step 1 – Remove everything from under your sink including cleaning supplies and unplug the dishwasher and garbage disposal.  Step 2 – Turn off BOTH water valves below sink. Make sure to turn off both hot and cold water valves. NOTE: If they won’t turn or snap off, you need to turn off the water to your home and replace the water valves too! 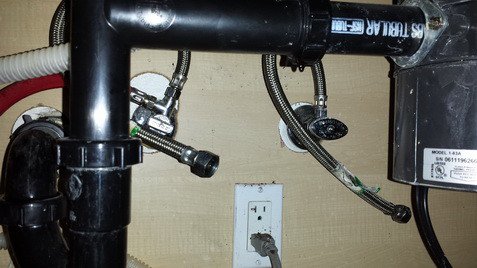 Step 3 – Remove the faucet water lines from the valves with your adjustable wrench. NOTE: You are removing all water lines from the old faucet. 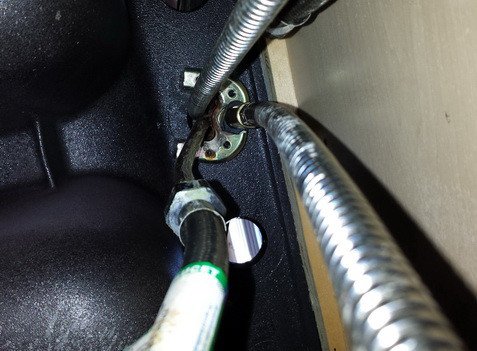 Step 4 – Next climb into the cabinet with a flashlight and screwdriver or wrench and loosen and remove the adapter ring or whatever is holding the faucet to the sink. 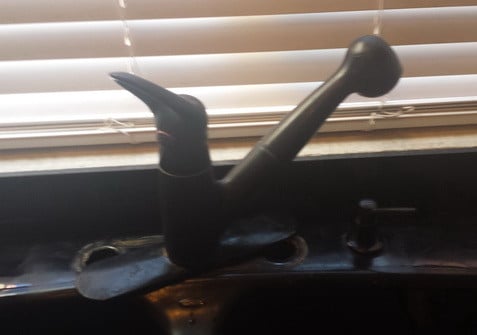 Step 5 – Once all plumbing and hardware is removed, carefully slide the old kitchen faucet up and out of the sink holes. The old kitchen faucet is now removed! 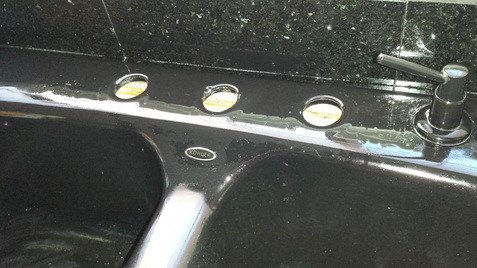 Step 6 – Clean where the old faucet was on the sink using a comet type cleaner and a green scrubber. This area needs to be super clean as the new faucet will be installed here and hard water marks may be visible. After it is super clean, spray some Orange Glo or oil based polish and wipe clean. 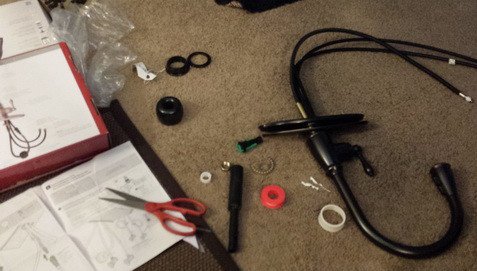 Step 7 – Open the box containing your new faucet and read ALL instructions FIRST! Some faucets need to be partially disassembled before installation for various reasons. Also, a special tool may be included to make your life easier when installing so inspect everything in the box.  Step 8 – Once the sink installation area is clean and the new faucet is together, set it carefully into the holes. You may or may not need to use the included deck plate so install it as your installation requires. Use plumbers putty on the bottom of the deck plate to prevent water from seeping into the below cabinet.  Step 9 – Climb back under the sink and tighten the nut or the secure plate that holds the faucet to the sink. Make sure you get this tight as this is what will be holding the faucet securely to the sink. Make sure you have the faucet aligned on the sink correctly before you fully tighten it into place. Also, you may need to use the Basin Wrench at this point or the special tool that was included with your faucet. 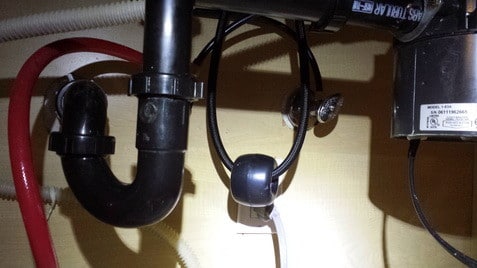 Step 10 – Once the faucet is fully installed on the sink, connect the faucet water lines to the hot and cold valves. Use plumbers tape on the threads of the water lines to prevent water leakage. Attach the water sprayer line also and install the weight included to hold the sprayer in place. 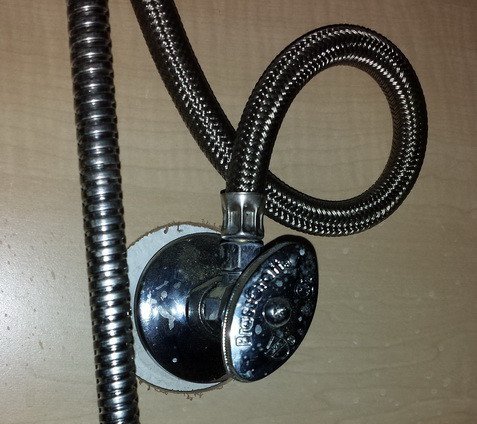 Step 11 – Once EVERYTHING is in place and secure, turn on both the cold and hot water valves. Check for leaks on ALL water lines. 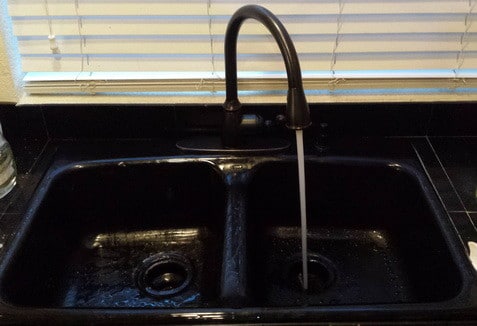 Step 12 – Turn on the new kitchen faucet and continually run the water. Using a flashlight, check under the sink for leaks. Check the 2 water valves coming from the wall and the actual faucet itself. Use the sprayer on the faucet to get water running through that line too. Make sure everything works and is not leaking. It is best to NOT put all of you cleaning supplies back under the sink yet. Over the next day, periodically check under the sink for water that may be leaking out. You can plug the garbage disposal and dishwasher back in at this time. 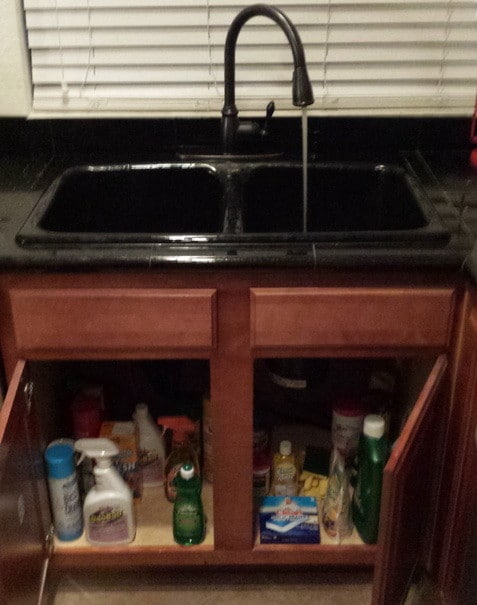 Step 13 – Once you are confident there are NO leaks put all of the cleaning supplies back under sink. Clean up all junk that may be left over from the install and check everything one more time. CONGRATS!! You have successfully installed your new kitchen faucet yourself! Another kitchen spigot is a simple and moderate approach to overhaul your space. With a couple of normal devices, it's anything but difficult to supplant or introduce a kitchen fixture.  Before You Shop In case you're supplanting the fixture in your current sink, look underneath the sink to perceive what number of openings it has - more often than not somewhere around 1 and 4. This decides the kind of spigot that will work with your sink. A one-gap fixture can be introduced in a 3-or 4-opening sink by including a deck plate, however not the other way around. Step 1 Kill the water valves under the sink. Turn on the fixture to mitigate weight in the lines. Kill energy to the transfer, if pertinent. Step 2 Snap a photo of the pipes setup before disengaging to use as a source of perspective later. Step 3 Utilize a little can under the associations with catch water as you disengage supply lines.  Step 3 Step 4 Have someone hold the faucet in place from above the cabinet, while you use a basin wrench to loosen and remove the nuts holding the faucet.  Step 4 Step 5 Remove the faucet and clean grime and / or sealant from the sink's surface.  Install the New Faucet ! Caution ! Because all faucets are different, defer to the manufacturer's installation instructions. Step 1 Place the rubber or plastic gasket, or trim ring, over the faucet holes in the sink and set the deck plate. Refer to the manufacturer's instructions regarding the use of caulk or plumber's putty in gasket installation.  Step 1 Step 2 Feed faucet lines into the hole(s).  Step 2 Step 3 Install washers and nuts underneath the sink. If you used caulk or plumber's putty for the gasket / trim ring installation, wipe away excess underneath the sink.  Step 3 Step 4 For pull-down faucets, attach the quick-connect hose to the supply pipe. Pull down on the hose and attach the weight.  Step 4 Good to Know The weight needs clearance to hang freely underneath the sink. Step 5 Connect water supply lines. Use plumber's tape if necessary.  Step 5 Caution Do not overtighten supply line connections. Step 6 Turn the water on slowly and check for leaks. Tighten connections if necessary.  Step 6 Step 7 Remove the aerator from the faucet. Slowly turn the water on and let it run, aerator-free, for a few minutes to clear the lines. Recheck everything for leaks and make readjustments.  Step 7 Step 8 Turn the faucet off and replace the aerator.  Step 8 Kitchen spigots are an immaculate centerpiece for an utilitarian and lovely kitchen. They are great for their intense completes and trickle free execution that oppose discoloring and scratching. Different styles are found in the market that can turn an easygoing look to an ace gourmet expert situated kitchen. The numerous sink fixtures are all around from separated water spigots to prep-sink spigots, chilly and hot fixtures. There are different models that are ergonomic when contrasted with the pullouts. Others include their eatery style for the best appearance. In picking the best kitchen fixtures, property holders must pay consideration on their value and day by day utilize. Aside from it, testing them first is essential. The levers and handles ought to be taking care of business conditions. The sprayer needs to haul out effectively. The sink must be considered on first while the fixture gaps must be relied on first. 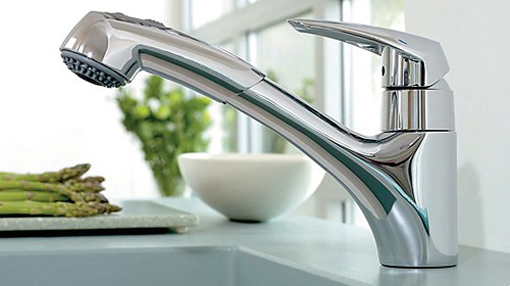 For the kitchen remodel, kitchen spigots with client driven components are likewise awesome to have. These are planned and impeccably created by the brilliant ergonomics. Or disaster will be imminent, decide for haul out flushing showers that range in haul down or haul out splash.
Really, purchasing kitchen spigots just require a certain something; kitchen fixtures that are produced using excellent materials. Paying consideration on the quantity of gaps is additionally essential. Conventional fixtures as a rule have their hot and frosty water taps that need three openings for gush and taps. Other piece fixtures require a solitary opening for a handle and another gap for a sprayer. The single-gap spigot is more well known in view of its simplicity of upkeep and operation. In beginning on putting another sink, pay consideration on the quantity of the openings in view of their necessity and accommodation. As said, it is suggested that kitchen spigots must have sprayers. These are a famous element that can be included the modernized spigots. In acquiring them, ensure that the quality and tough sprayers are picked, Single-handle or two handle kitchen spigots may likewise be introduced. These must be appended to the side. These might be independently mounted while the splash might be isolated. Gush fixtures are likewise cheap and minimized. Gooseneck models likewise have their higher clearances. All the more significantly, picking the fixture head swings is sufficient in achieving the sink. The fixture must be kept relative according to the establishment. In the wake of getting them, the repair and establishment must be done appropriately, The spigots can perform taking care of business gave that they are introduced and repaired legitimately! You are welcome to Home Interior Ideas. Numerous people have utilized net for finding actualities, rules, articles or another reference for their motivations. Like others are. Do you touch base here to have new thought regarding How To Replace Kitchen Faucet? Precisely what number of sites have you perused for acquiring more insight with respect to How To Replace Kitchen Faucet? Step by step instructions to Replace Kitchen Faucet is one of expanded specialty as of now. We understand it from google motor information like adwords or google patterns. With an end goal to give helpful data to our perusers, we have endeavored to get the nearest significance pic about How To Replace Kitchen Faucet. Also, here you can see now, this photo have been extricated from solid source. We think this How To Replace Kitchen Faucet picture will give you a couple of extra point for your need and that we trust you appreciate it. We know, we may have differing view identifying with this however at any rate we have attempted our best. 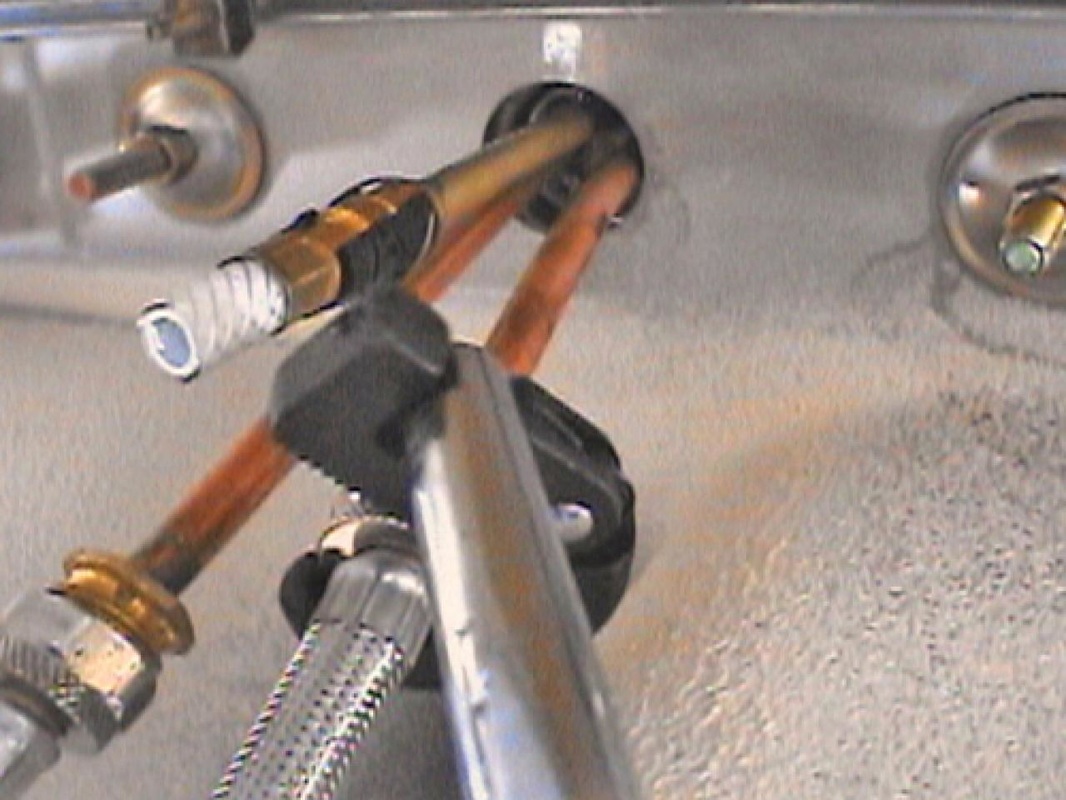 Well known How To Replace Kitchen Faucet 34 For Your Interior Design For Home Remodeling with How To Replace Kitchen Faucet 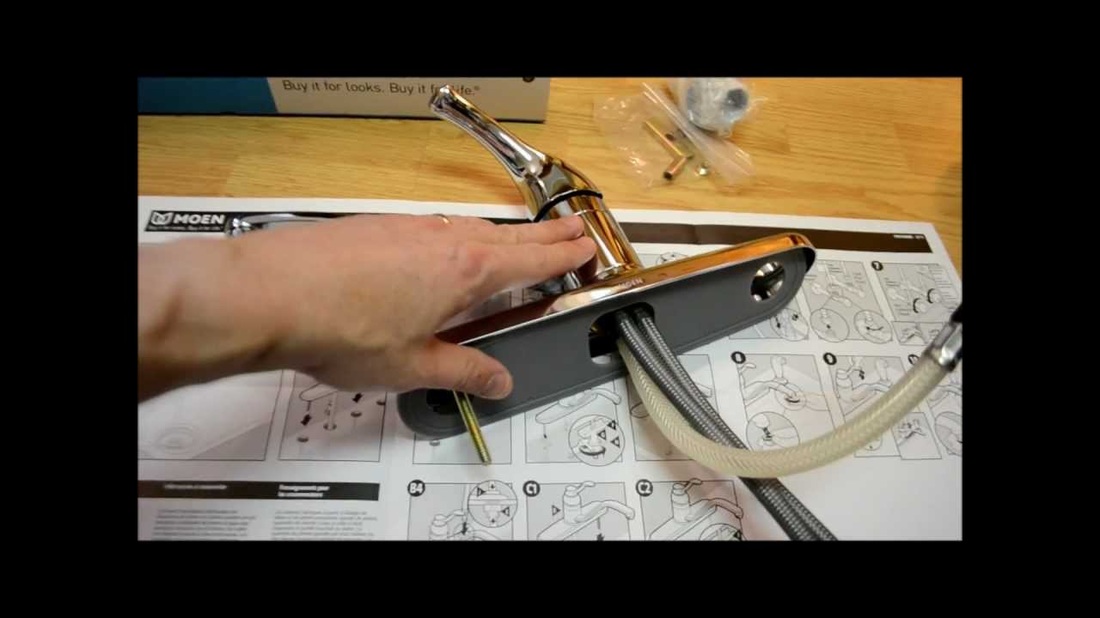 Decent How To Replace Kitchen Faucet 28 For Your Inspiration To Remodel Home with How To Replace Kitchen Faucet 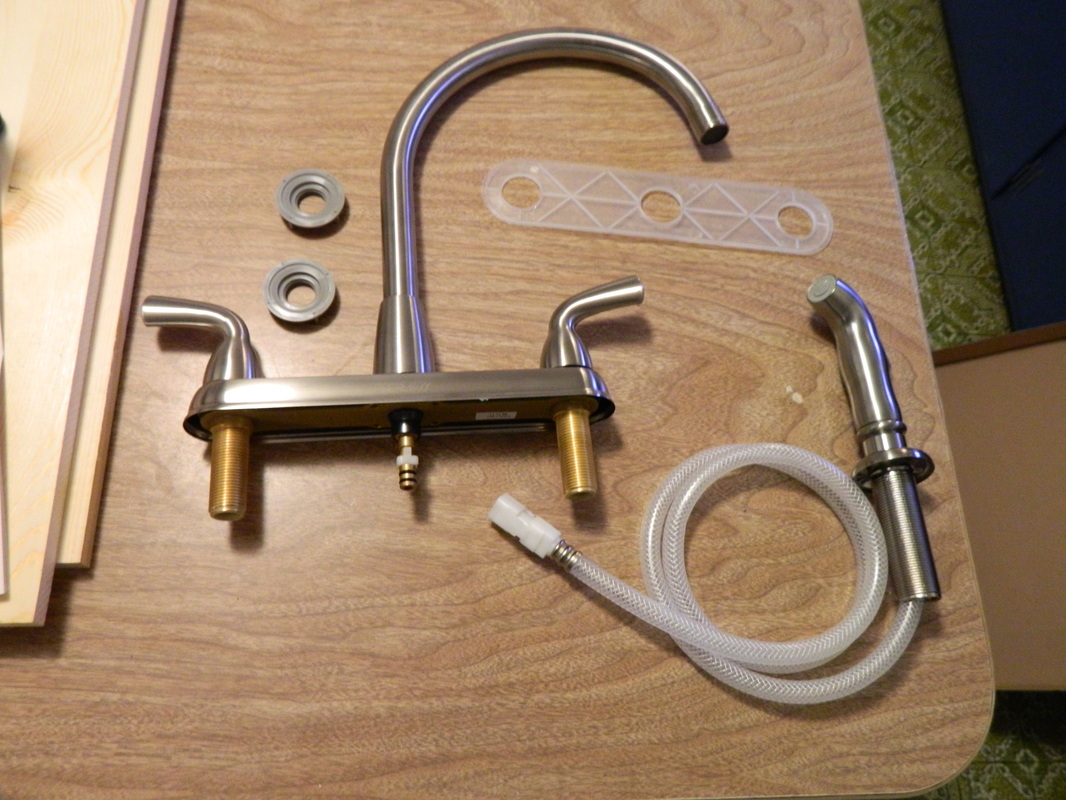 Cool How To Replace Kitchen Faucet 31 In Home Remodeling Ideas with How To Replace Kitchen Faucet  Dynamite How To Replace Kitchen Faucet 36 About Remodel Inspirational Home Decorating with How To Replace Kitchen Faucet 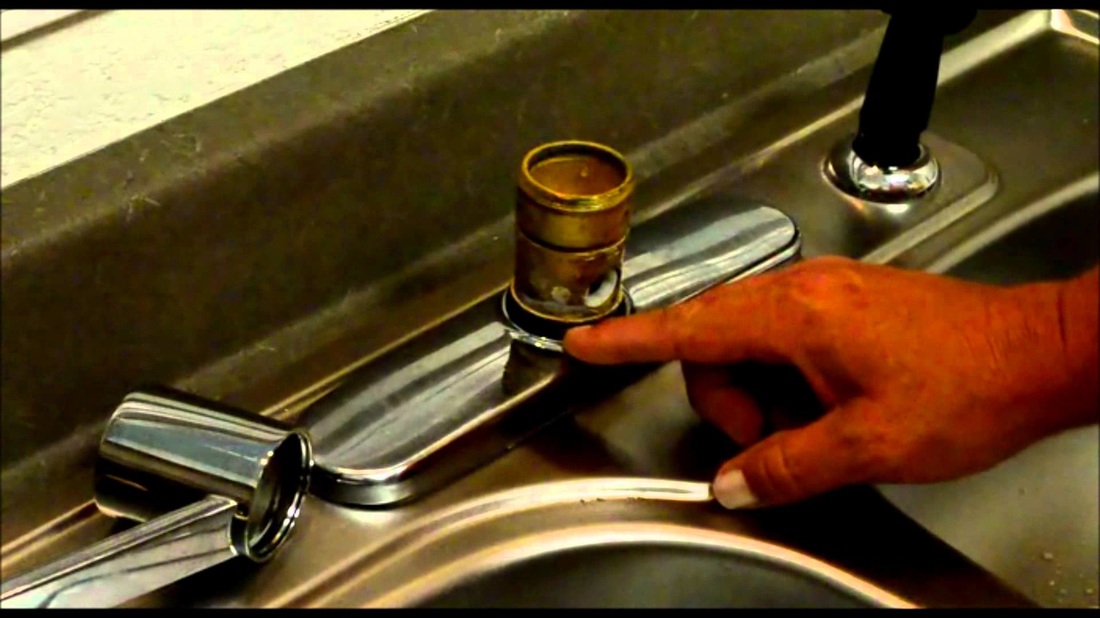 Pleasant How To Replace Kitchen Faucet 83 About Remodel Small Home Decoration Ideas with How To Replace Kitchen Faucet 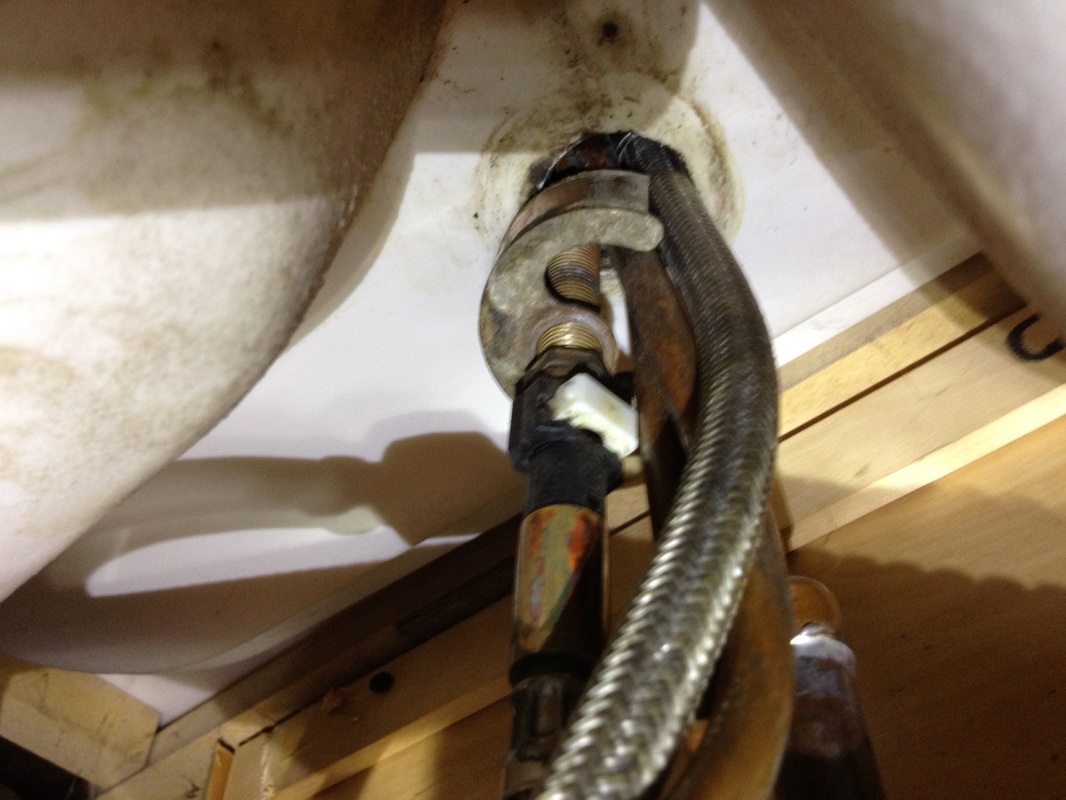 Great How To Replace Kitchen Faucet 27 About Remodel Interior Home Inspiration with How To Replace Kitchen Faucet  Stunning How To Replace Kitchen Faucet 28 On Home Remodeling Ideas with How To Replace Kitchen Faucet 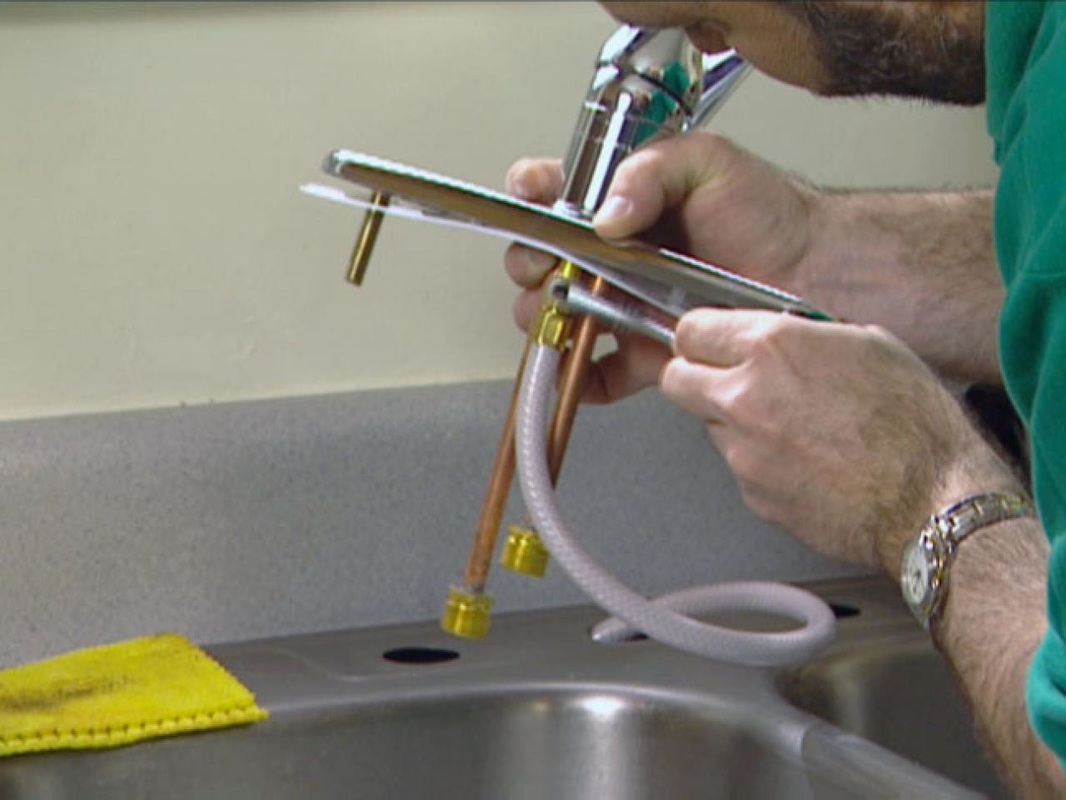 Adorable How To Replace Kitchen Faucet 41 In Designing Home Inspiration with How To Replace Kitchen Faucet 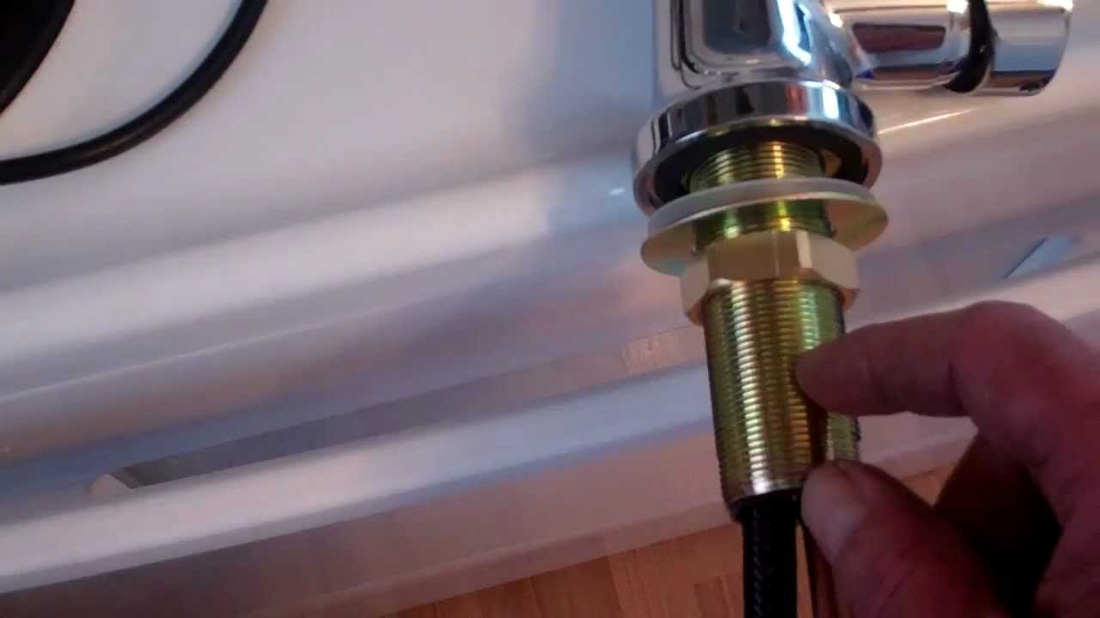 Consummate How To Replace Kitchen Faucet 79 In Interior Design For Home Remodeling with How To Replace Kitchen Faucet 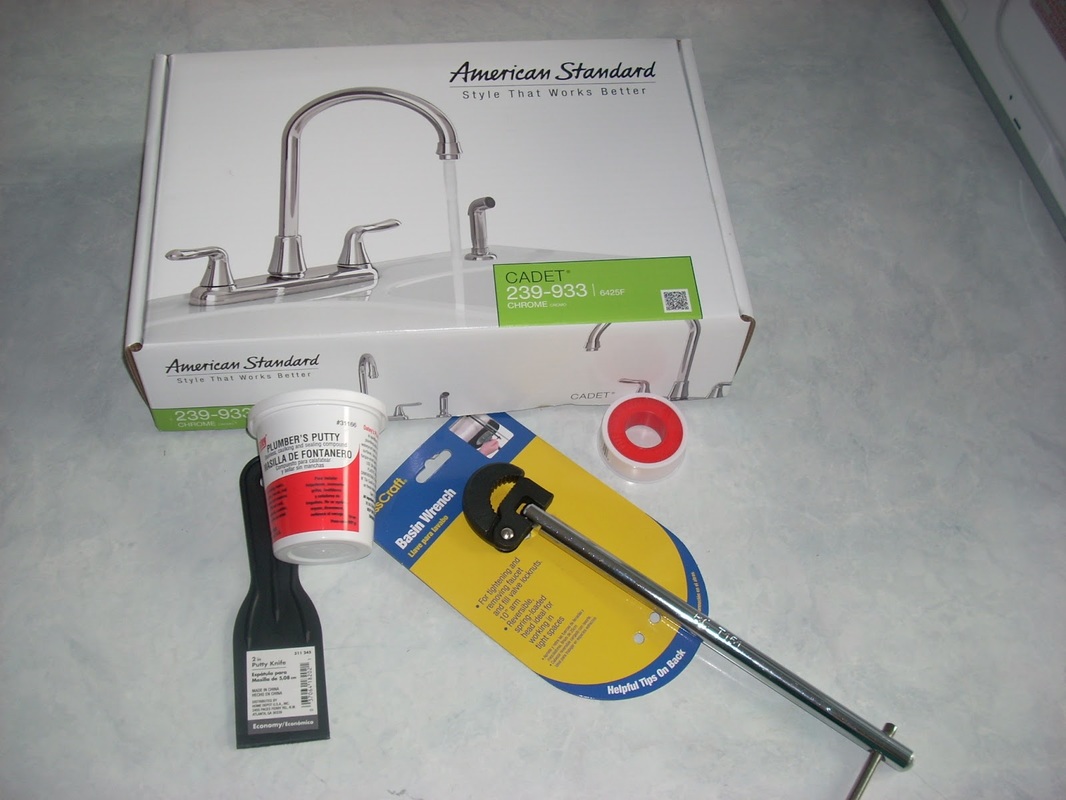 Idealize How To Replace Kitchen Faucet 65 About Remodel Home Remodel Ideas with How To Replace Kitchen Faucet 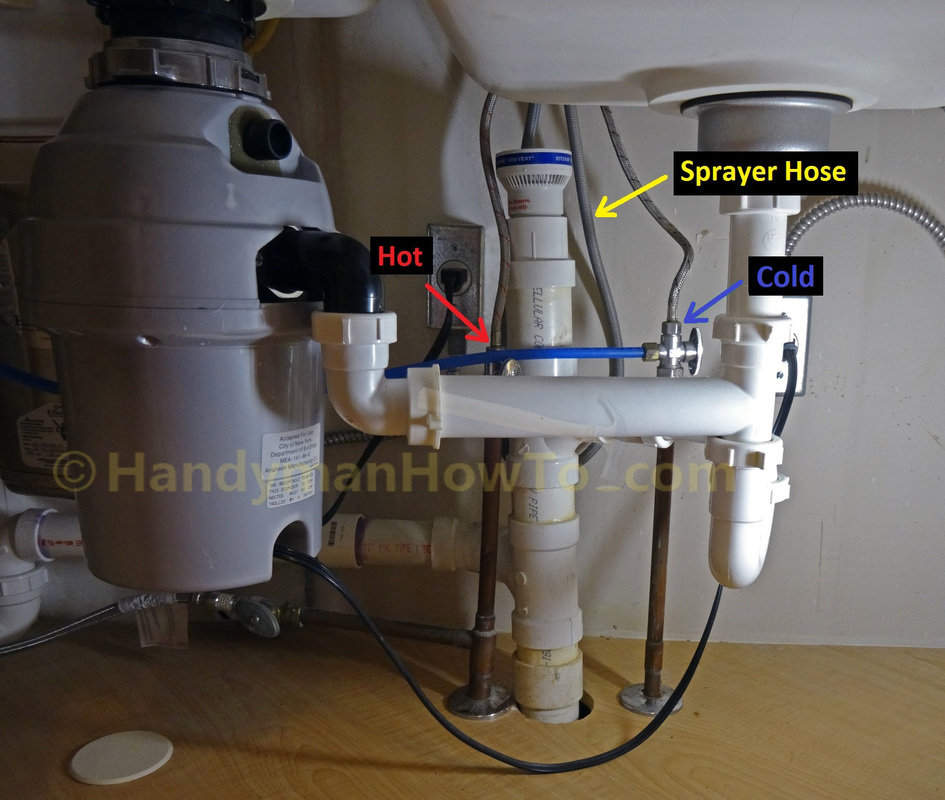 Adorable How To Replace Kitchen Faucet 16 With Additional Home Decorating Ideas with How To Replace Kitchen Faucet 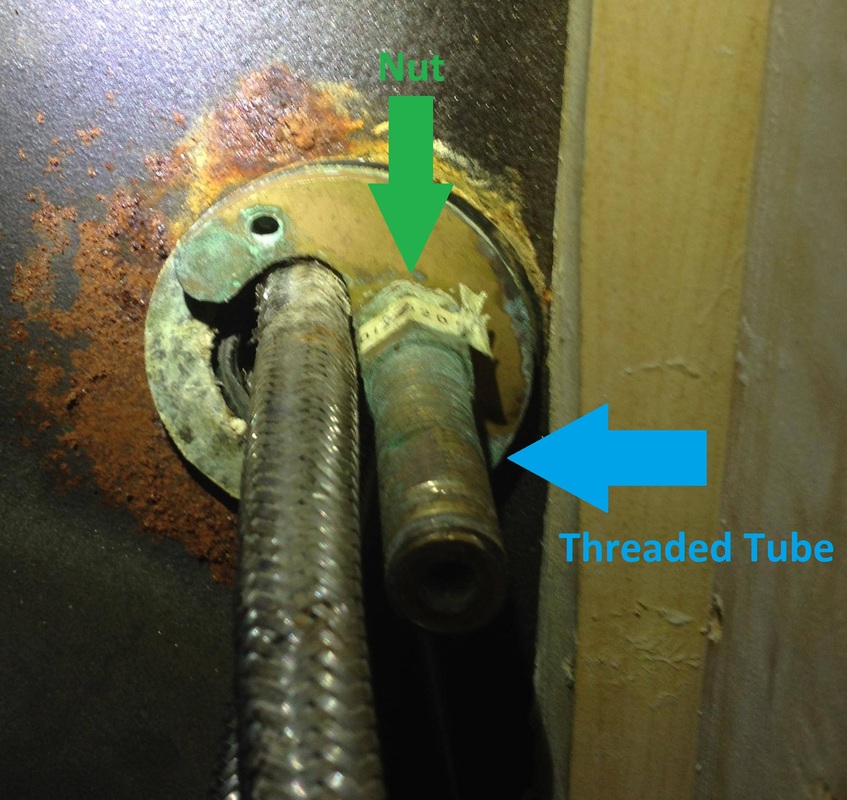 Stupendous How To Replace Kitchen Faucet 13 With Additional Home Decorating Ideas with How To Replace Kitchen Faucet There're accessible for down load, on the off chance that you acknowledge and need to possess it, basically click spare logo in the website page, and it will be instantly down stacked to your desktop PC. At long last in the event that you wish to increase interesting and the most recent realistic related with How To Replace Kitchen Faucet, please tail us on google in addition to or spare this site, we attempt our best to present you consistent overhaul with all new and crisp pictures. We do trust you like remaining here.
In the event that your kitchen spigot is spilling, you ought to consider supplanting it. It is likewise an incredible approach to redesign the turn upward your kitchen with little exertion. Supplanting a kitchen spigot is one of the most effortless pipes occupations a property holder could do. This article will train you on the best way to supplant a kitchen fixture. 1.Turn off the water supply. You can likewise kill the water supply on the supply channels prompting the fixture. Turn on the spigot to deplete any overabundance water in the lines.
2.Take separated the supply lines prompting the spigot. Utilize a flexible torque to unscrew the nuts that are holding the lines to the spigot get together. 3.Remove the fixture gathering. Utilize a movable torque to unscrew the nuts holding the spigot into position. Lift out the fixture get together. Clean the edges of the mounting gaps. 4.Slide in the new fixture gathering. 5.Attach the fixture to the sink and connect the mounting nuts from underneath the sink. Reattach the water lines and walk out on the water supply back on. Test for holes. 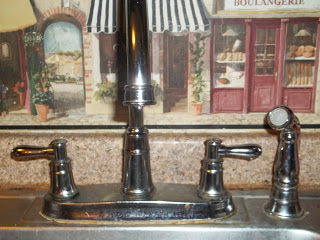 She leaks ! Perusers of the blog realize that I'm been battling with my kitchen sink throughout recent months. Here's the precipice notes rendition: · I supplanted my flawed kitchen spigot. It was fine for a year and started to spill once more. · I supplant both the hot and frosty cartridges. That was fine for 3 months · and after that the icy water started to spill. · I supplanted only the frosty cartridge. It was fine for 3 months · until it started to spill, once more. On account of the lifetime guarantee the maker guaranteed to send me an altogether new spigot. In all honesty, I thought they were lying. After two weeks, I got this: 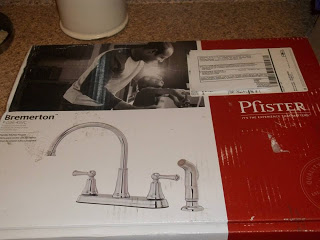 New Fauchet So now, time to introduce the new (ideally airtight) spigot. These headings are for a 4-gap set (like the one presented previously) For this venture you will require: · Faucet · Plumbers putty · Wrench · Towels · Flashlight · Newspaper · Pillow · Goggles This venture ought to in a perfect world take not exactly 60 minutes. Truly everything rises or falls on that it is so natural to evacuate the old spigot. Introducing the new spigot is quite straightforward. Expelling the old installation: 1. The principal request of business: Turn off the water under the sink. My sink has 3 handles (hot, frosty, dishwasher). I kill every one of the 3. 2. Next, turn the fixture on to the max. This will get out the greater part of the water staying in the installation. It won't dispose of the majority of the water, yet it's a decent begin. 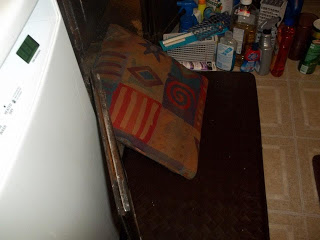 I'm short so I require a cushion for lift and solace when working under the sink. 3. Presently position your pad under the sink. I have genuinely short arms so the pad offers me both height and solace from the edge of the bureau. Keep a perfect towel helpful. When you expel the water lines water will spill out. Not excessively, but rather you're probably going to get wet (presumably all over). 4. Lie on the cushion and disengage the water lines. This will be entirely simple on the off chance that you have a more up to date spigot and will probably be cuss-commendable in the event that you have an old apparatus. As my installation is just year and a half old my water lines fell off decently effectively. 5. Presently expel the old apparatus. The old apparatus is held set up by extensive nuts. Once more, this is a simple stride with more up to date installations and may draw out your internal mariner on the off chance that you have more established apparatuses. Be tolerant and recall that WD40 is your companion. Additionally, whacking it with a torque may expel somewhere in the range of pressure and the nut! 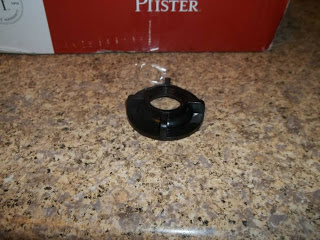 This is the nut that holds the fixture set up. 6. Since the apparatus is expelled, evacuate the nut that holds the sprayer set up. 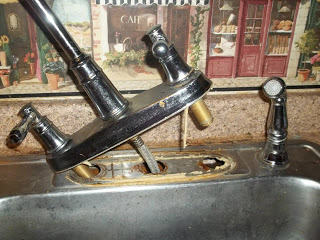 Bye old leaker! 7. Move down on top of the sink, you ought to now have the capacity to effectively lift out the old spigot and sprayer. 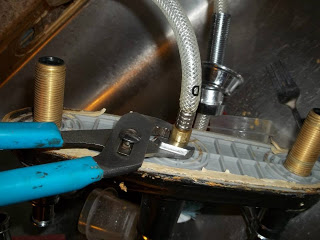 Disconnect the sprayer from the old faucet 8. Clean any gunk, handymen putty and foulness left by the old apparatus. You won't not have foulness. My spigot had foulness. 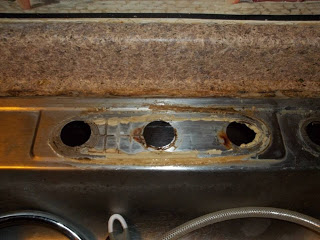 It was FILTHY underneath my faucet!  All cleaned up! Introducing the new installation: 9. Presently it's the ideal opportunity for handyman's putty. Consider handymen putty like play doh from when you were a child.  Plumbers putty! Squeeze off a bit from the blob inside the compartment and move it into a play batter wind. You'll require enough snakes to go the distance around the plastic seat thingy [not its genuine name].  Snake of plumbers putty 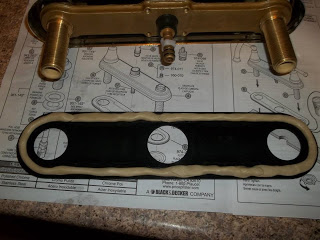 Putty all around the plastic thingy! 10. Focus the plastic seat thingy over the openings in the sink and press delicately. You simply need to apply enough weight for it to remain set up, however insufficient to truly crush the putty excessively. 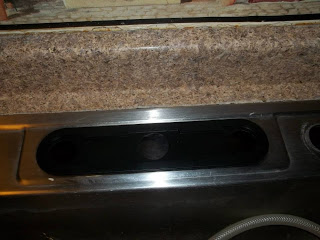 Plastic thingy pressed in place 11. Next introduce the sprayer. The sprayer will have a holder for it to rest in and a few washers. Counsel your direction sheet to ensure that you introduce every one of the washers in their legitimate request. A few washers go on top on the sink. Others go under the sink. 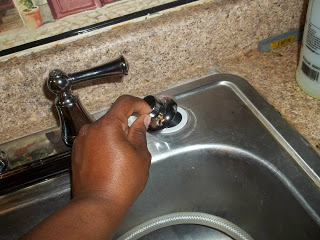 Seat thingy for sprayer hose 12. With the splash spout introduced, wind the shower spout through the inside opening of the sink. [This will spare you somewhat of a migraine later]. Presently join the splash spout to the new apparatus [per the direction sheet]. 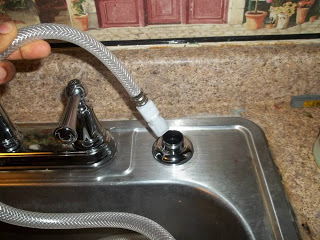 Install sprayer hose 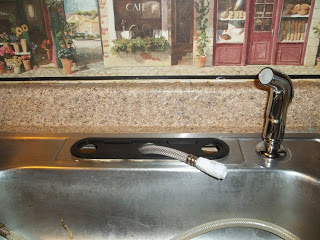 Pull hose through center hole 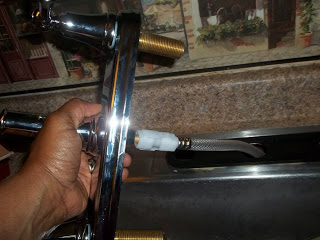 Attach sprayer hose to faucet 13. Focus the new installation over the plastic seat thingy and press a bit to hold it set up. 14. Presently fix the new installation set up with the nuts gave. I propose hand fixing the nuts then give a ¼ turn with a torque. 15. Connect the water line. Once more, hand fix, and after that complete the process of fixing utilizing the torque. I make these interfaces are tight as I can get them. 16. Turn the water on ensure everything works! 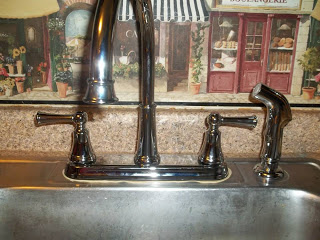 ALL DONE!!! As indicated by the headings that is basically it. By and by, I get a kick out of the chance to test my work. The last darn thing I need is to find some irritating release in seven days. Here's presently you test your work: 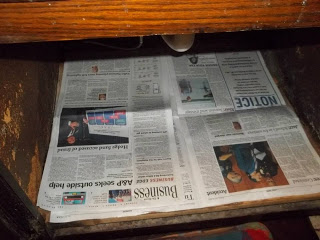 Leak testing - Place newspaper under sink Before you set everything back under the sink, spread daily paper under the sink and abandon it for a couple of hours. On the off chance that you return later and the paper is dry you're all done. In the event that there is a wet stamp (even a little one) on the paper, circle it. 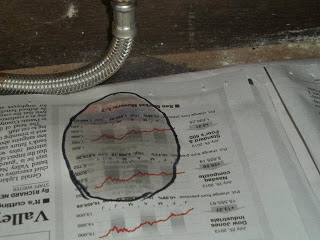 I found a tiny leak Presently hold up 30 minutes and check your wet spot once more. On the off chance that the wet spot has become bigger than your circle, you have a dynamic hole. Look at the associations specifically over the wet spot to discover your hole. 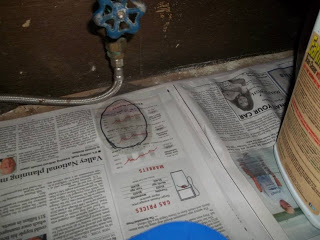 Oh no! This is an active leak! The most widely recognized reasons for breaks are broken water lines or free associations. Kill the water, detach and after that re-fix your associations. Put down another bit of daily paper. In the event that despite everything you have a hole you may need to supplant your water line. The water line can look fine and dandy, however the washer hanging in the balance might be worn or missing. Take the old waterline to the store with you when you go to purchase the new one. That way you know precisely what you're searching for.
Once you've settled your holes and the daily paper is dry, you're good to go. |
AuthorWrite something about yourself. No need to be fancy, just an overview. Archives
October 2016
Categories |
 RSS Feed
